

Nornir Chests, also known as rune chests, are precious and permanently raise your character’s level in God of War Ragnarok. They provide you with two rewards. One is the Idunn Apple, which increases Kratos’s Health bar, while the other reward is Horns of Blood Mead, which increases Kratos’s rage meter.
Both upgrades are crucial if you wish to face off against the stronger monsters that will gnaw at you during the end game. The rewards keep alternating, so if you got an Idunn Apple on your first chest, you would get the Horns of Blood Mead on the next.

Not all chests are accessible at every point in the game. Some require specialized equipment only available after you finish certain parts of the story. For those, you will have to grind to get your hands on as many as possible. Nonetheless, check out all the locations below to be as prepared as possible.
Key Takeaways
Svartalfheim
First, I will list all the Nornir chests in Svartalfheim. The maximum number of chests in this Realm is ten, all scattered throughout. So, without further ado, let’s dive right in.
Aurvangar Wetlands
1st Chest
In the Aurvangar Wetlands, you’ll find two Nornir Chests that you can easily obtain by following these steps:
-
Locate the first chest near the geysers. Freeze the geysers using your Leviathan axe and frost ability to create a path across.
-
After crossing, look to your right to spot the Nornir Chest. To access its contents, destroy the three runes. They are easy to find:
-
The first rune is directly to the right of the chest.
-
The second rune is on the island to the left of the chest. You’ll need to throw your axe to break it.
-
Descend from the chest by freezing the geyser below for the third rune. Look for a glowing rune under a tree and destroy it.
-
-
Return to the chest on top to claim your reward.
2nd Chest
To access the second chest in Aurvangar Wetlands:
-
Navigate under the small wooden bridge. It’s near the legendary chest area.
-
Once you’re under the bridge, dock your boat and head right to find the chest.
-
To unlock this chest, you must interact with golden spinners to display the correct rune. For example, the first spinner is to the right of the chest and should match the first rune on the chest, the “P” rune. Freeze the geyser to ensure the correct rune is displayed.
-
Find the second rune by going around the first spinner and repeat the process.
-
The third rune is near the legendary chest. For those who haven’t collected it yet, it’s towards the top left corner. Hit it until it displays the “N” rune.
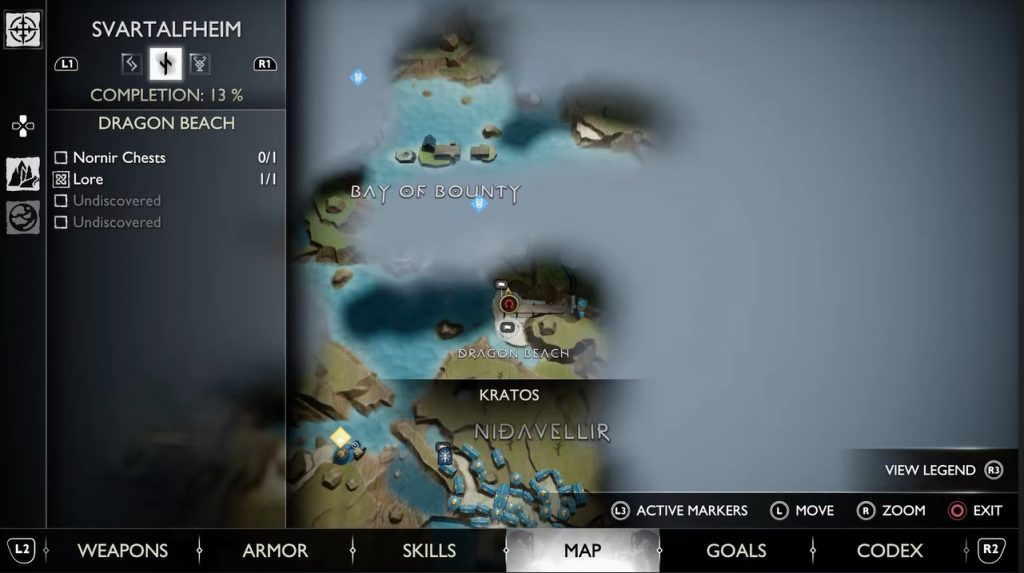
Dragon Beach
At Dragon Beach, you’ll find only one Nornir Chest, so it won’t take much time. Here’s how to get it:
-
The chest is at the back of the area near the geyser, making it easy to spot.
-
To find the first rune, look behind the chest. Freeze the geyser and aim correctly to destroy it.
-
The second rune is located around a crate behind a gate. You can damage the gate with sonic arrows or go around the rocks and destroy it from behind.
-
For the third rune, locate another geyser near the other crane. The rune is hidden behind the geyser’s water. Freeze the geyser to reveal the rune and destroy it to claim your reward.
These steps will help you easily unlock the Nornir Chest at Dragon Beach.
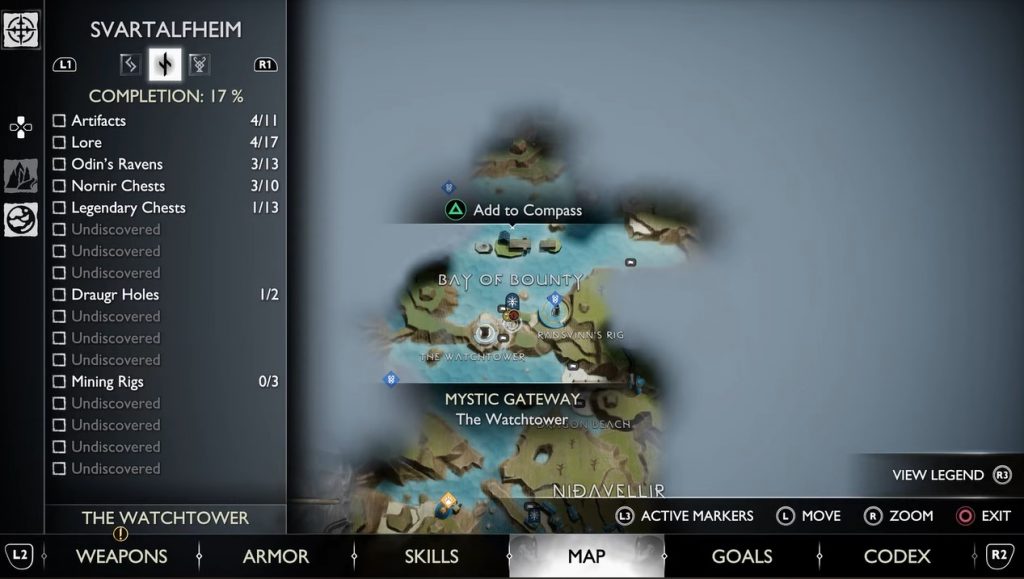
Radsvinn’s Rig
In Radsvinn’s Rig, you’ll find one Nornir Chest near the rig’s top, beside the forge. To unlock it:
-
Locate the chest and light three torches using your Blades of Chaos.
-
The first rune is to the left of the chest and is easy to spot.
-
Find the second torch near the metal fence to the right of the furnace, and use your Blades to light it.
-
The third torch is at the backside of the furnace. You might encounter barrels blocking your path; ask Atreus to break them with his arrows. When you’re close to the torch, throw your chains to light it.
Alberich Island
In Alberich Island, you’ll find a straightforward Nornir Chest that’s easy to locate but requires speed and accuracy to unlock.
-
As soon as you dock onto the island, you’ll see the chest right before you.
-
To open the chest, you need to hit three bells quickly. Here’s where you’ll find them:
-
The first bell is near the left side of the chest, hidden behind a gate.
-
The second bell is directly opposite the chest but not accessible initially. Ask Atreus to shoot the barrels to lower the bell.
-
The last bell is located above the chest.
-
-
Hit the bells in this specific order and quickly, in succession, unlock the chest and claim your reward.
Myrkr Tunnels
To unlock this chest, you must return to Svartalfheim through Brok’s special passage. Follow these steps to access it:
-
Light three torches:
-
The first torch is directly across from the chest, and you can ignite it with your Blades of Chaos.
-
The second torch is to the left of the chest but at a distance. Use Sigil Arrows to create a path to it, then light the bubbles with your blades to ignite it.
-
Find the third torch hidden behind some barrels across the corridor from the chest. Make your way to it and light it.
-
The Forge
Svartalfheim, The Forge Chest
In The Forge, you’ll find one of the Nornir Chests accessible through the storyline mission that leads you back to Svartalfheim to collect a spear.
Follow these steps to unlock it:
-
Enter the Myrkr Tunnels and proceed through the opening that appears to reach the chest.
-
The Spear is essential for unlocking this chest. You need to impale three runes and then detonate your spear simultaneously.
-
Locate the first rune beside the chest on the cliff to your left.
-
The second rune is across from the chest, hidden inside a small hole.
-
As for the last rune, you can find it on your way to the mining carts, positioned between two rocks on the cliff.
The Applecore
The Applecore in Svartalfheim has two precious Nornir Chests. Both will be integral if you wish to get more than 30 Nornir Chests. So, let’s talk about them individually.
1st Chest
To unlock the first chest, located right at the start by going down the zipline and using your spear to jump up to it, follow these steps:
-
Hit all three runes with your spear and then detonate them simultaneously.
-
Find the first rune on a raised platform across from the chest in the hollow area. Impale it with your spear.
-
Look up to spot another rune nearby.
-
Go to the top of the rocks for the last rune and locate the third one there.

2nd Chest
To unlock the second chest located in the room with the Water Puzzle, follow these steps:
-
Look for a crawlspace in that room and make your way through it.
-
In this new area, you’ll find a wind spot to detonate with your spear, revealing a new mystic gateway and a Nornir Chest.
-
Like the previous chest, unlock this one by destroying all three runes simultaneously.
-
Find the first rune across the newly revealed mystic gateway.
-
The second rune is hidden behind some rocks near the Yggdrasil tear. Break through the rocks and impale the second rune.
-
Now, for the tricky third rune: From the Yggdrasil tear, move in the opposite direction to the end of the platform. Hover your crosshair around the right side of the stationary cog until it changes, revealing the location of the third rune. Fire your spear here and detonate all three runes.
Jarnsmida Pitmines
Jarnsmida Pitmines Chest Location
To unlock the chest in Jarnsmida Pitmines accessed through the gate next to your newly found Mystic gateway in Applecore, follow these steps:
-
Head to the location described.
-
To unlock this chest, you need to light up three braziers; for this, you’ll require Sigil Arrows in addition to your Blades of Chaos.
-
The first rune, easily lit with your Blades of Chaos, is to the left of the chest.
-
Find the second rune by looking down from the platform opposite the chest. You’ll spot a torch on the left side. To light this torch, fire a line of sigil arrows from Kratos to the chest, then hit them with your Blades of Chaos. If the bubbles aren’t big enough, hit another sigil arrow in the middle.
-
The last rune is located to the left of the chest near the water wheel. Stop the water wheel with your axe, then light the torch with your blades to unlock the chest.
Midgard
Next up in our Nornir Chests guide, we have Midgard. Midgard is another small Realm in God of War Ragnarok that holds 4 Nornir Chests. They aren’t that difficult to unlock, so you know where to go if you are looking for some easy rewards.
Raider Hideout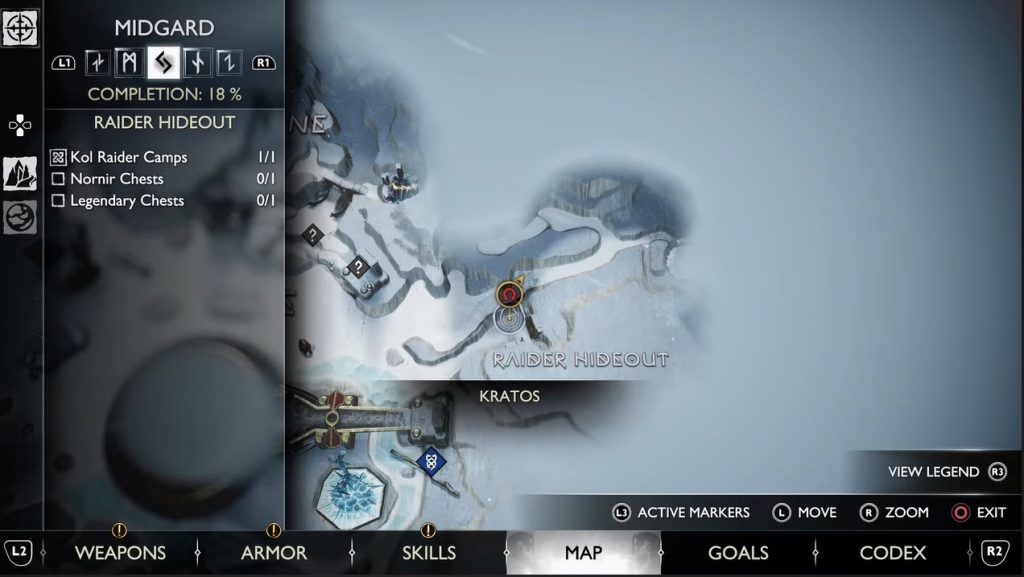
Riders Hideout Location
In the Raider Hideout, you’ll find one Nornir Chest under the pathway leading to the Mystic Gateway. Here’s how to unlock it:
-
Inside the house, defeat multiple raiders.
-
Pick up a firebomb from the group and throw it at the rocks blocking the opening around the Tapestry to light the first torch.
-
Look to the left of the opening, in the corner, to find the second torch. Use your blade to eliminate the red bramble, and then use Sigil Arrows to light up the second torch.
-
The third torch is located around the entrance. Use Sigil Arrows here as well to light it up.
If you struggle to beat them, check out our God of War Ragnarok Tips and Tricks guide.
The Oarsmen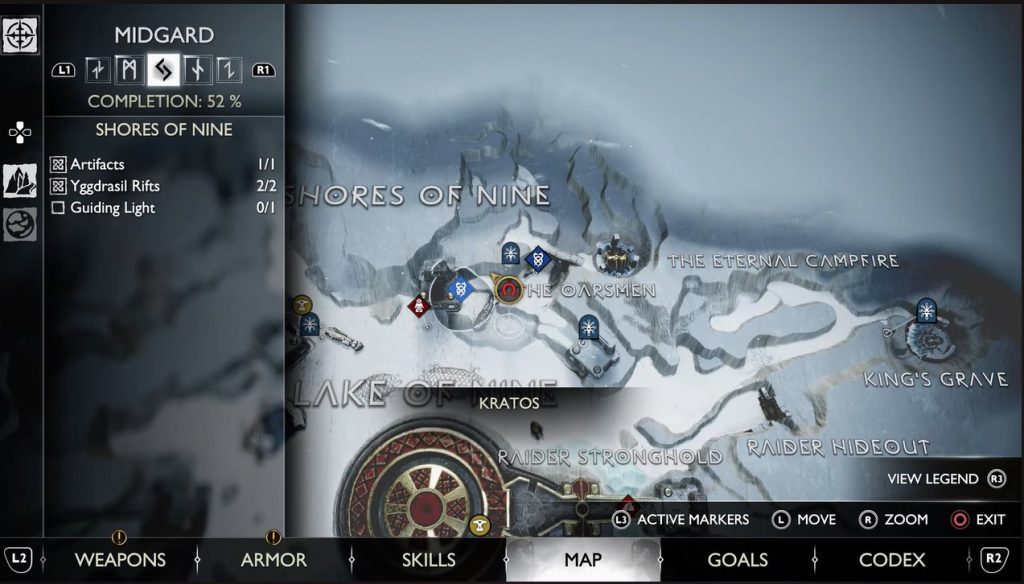
To unlock the Oarsmen’s chest near the Statue, follow these steps:
-
The Statue is beside the Mystic Gateway, making it easy to spot.
-
To unlock the chest, you need to ring three bells in rapid succession, but first, you must unlock an area.
-
Start from the locked gate and climb the wall beside it. Keep climbing until a cutscene interrupts, triggering a sub-boss fight with The Huntress. Focus your attacks on her horns for an easier victory.
-
After defeating The Huntress, climb the golden chain and use the silver chain. This will reveal a back door that you can use to access the next area.
-
Inside the room with the Nornir Chest, you can see the first bell in the crack in the wall. Hit it, then quickly run forward.
-
Make your way to the door you opened to hit the second bell.
-
For the last bell, turn around and hit the bell opposite the cavern.
Well of Urd
To unlock the chest that takes you to the northern side of Midgard, follow these steps:
-
Make your way to the end of the path that leads from the shop until you reach a cliff. Here, you’ll find the chest.
-
To unlock this chest, light up three torches using your Blades of Chaos or Sigil Arrows.
-
For the first torch, head in the opposite direction of the chest towards the climbing spot. Look to the left of it, and you’ll spot the first torch. Light it up with your Blades of Chaos.
-
Continue up the mountain using the climbing spot. On your way, you’ll see the second torch.
-
Keep climbing until you cannot go any higher. When you look down, the second torch will appear on your left.
-
You can either jump down and light it up with your Blades of Chaos or use Sigil Arrows.
-
Using Sigil Arrows for the second torch will save you from climbing up again, as the third torch is at the top.
-
Once you reach the top, turn right, and you’ll find the last torch. Light it up to unlock the chest.

Are These Worth The Effort?
Yes, Nornir chests are a great approach to exploring the world. Plus, they are very rewarding, so unlock each if you can. Moreover, they make your character inherently stronger and will greatly boost you in finishing the game.
I recommend getting your hands on these chests as you progress the storyline. This way, you will not miss out on your character’s potent upgrades.
Up Next:
- God Of War Ragnarok Trolls.
- God Of War Ragnarok Forsaken Breath Locations.
- God Of War Ragnarok Celestial Fossil Location.
Good job! Please give your positive feedback 😏
How could we improve this post? Please Help us. 💡
Meet Asad, A competitive sports fanatic having his expertise in FIFA and NBA. He’s been playing Fifa for years now and his work reflects his experience. Moreover Asad’s into Gaming journalism for more than 2 years now which helps him craft helpful guides for our readers especially when it comes to AAA titles like Final Fantasy and Call of Duty. Visit Asad’s steam to learn more about him.
