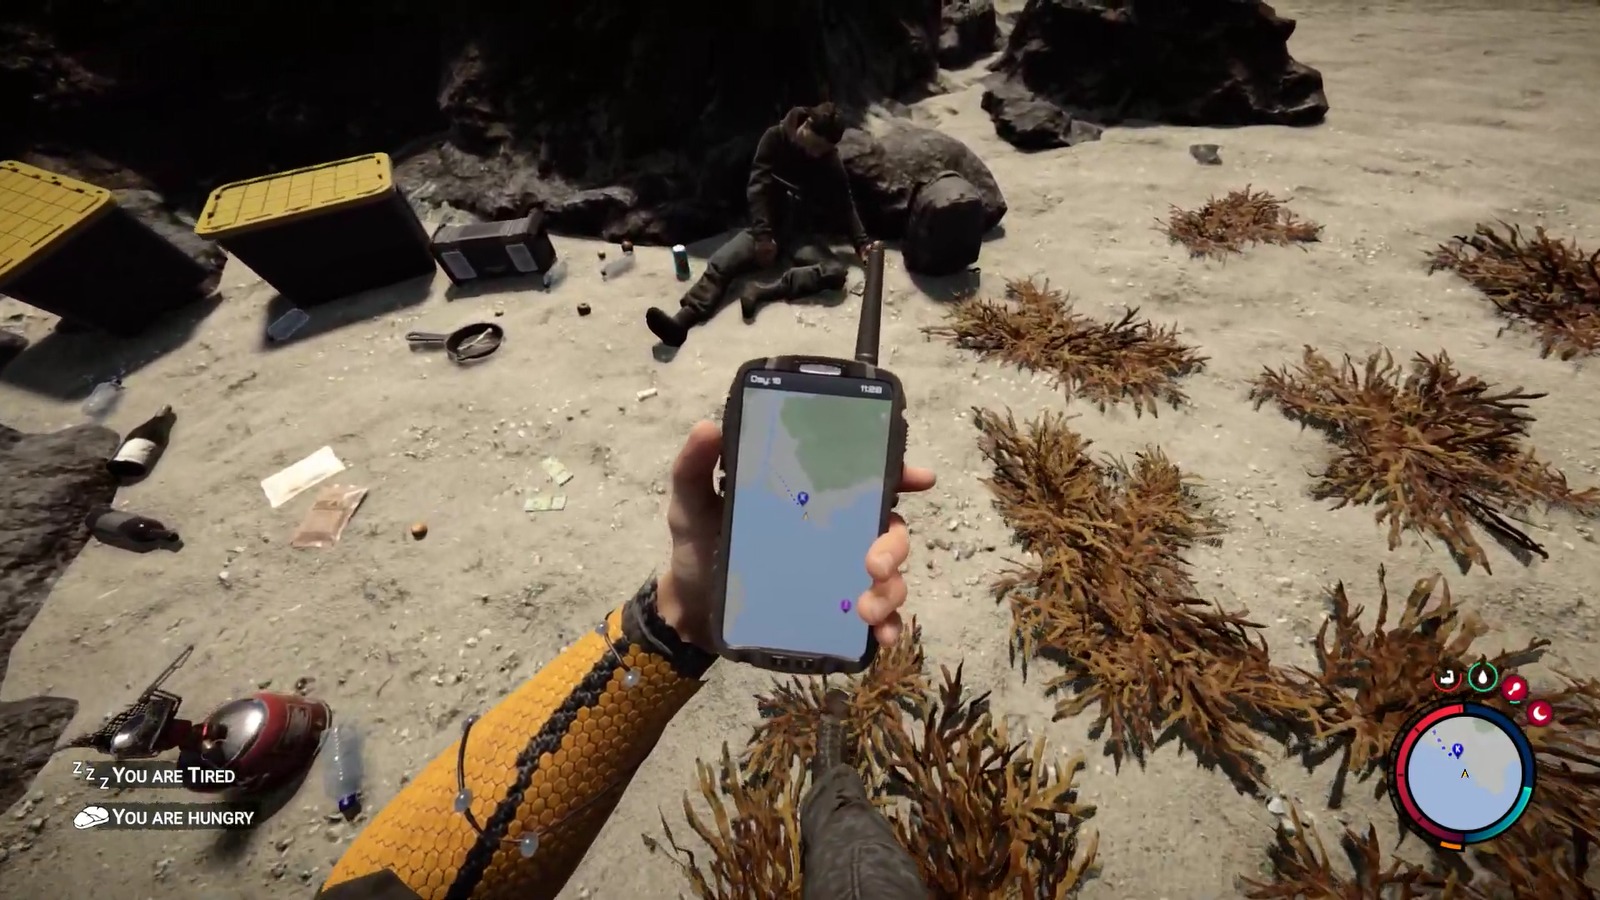
If you are looking to find Pistol early in the game, then you would have to travel a lot because the point where your helicopter crashes is very far from where the Pistol is. The pistol location holds importance because it is a similar point where you will find one of the GPS locators.
Key Takeaways
- The pistol is convenient in Sons of the Forest, as it is preferred when you need survival in tight situations.
- Its location overlaps with one of the GPS Locators, specifically, the one inside the water.
- You can find the pistol inside the inflatable boat after swimming.
- You will find the Pistol Rail on the same beach, which is necessary to connect attachments.
- Pistol attachments include Laser Sight, Flashlight, and Suppressor.
Pistol Location

- GPS Locator Marker: The location of the Pistol is marked in purple on your map due to its proximity to one of the GPS locators. This marker makes it easier to track.
- Underwater Approach: When you reach the beach near the marked location, you must swim a few meters into the water.
- Shark Warning: I advise being cautious while swimming because a shark guards an inflatable boat nearby. Make sure you have healing items like Medicine, Food, or Herbal Mixes.
- Retrieve the Pistol: Once the shark swims away from the boat, approach and climb inside. You’ll find a dead body on the boat, and the Pistol will be close to it.
- Additional Supplies: While on the boat, look for flares and ammo to ensure you have some rounds to use with the Pistol.

Ammo Locations
Ammo is always contained inside green boxes. Whenever you find any green box, it must be ammo for some weapon. Furthermore, you will find these boxes near most campsites.
Here’s what you should keep in mind:
- Green boxes contain ammo for various weapons, so always check them when you come across one.
- Explore caves and specific locations thoroughly to find ammo. It cannot be crafted, so you must search for it on the island.
- There’s a higher chance of finding magazines for your weapons at critical locations related to your main objectives.
- Once you have the gun and its ammo, focus on finding attachments to enhance accuracy and damage.
- Start by looking for the Pistol Rail; you’ll need it to attach other enhancements to your pistol.
Also Read: Sons of the Forest Armors.
Pistol Rail Location

Over there, you will see a dead body in a scuba suit, a couple of crates, and other accessories. You can find Pistol Rail on that body. Also, collect 9mm ammo from there and other valuable items that help you survive, like Meds.

My Recommended Attachments
1. Laser Sight

In the open area, you will see an abandoned golf cart and a tripod stand; these indicate that you have found the right place.
- Use a Shovel: Equip a Shovel from your inventory (if you don’t have one, refer to our guide on how to find a Shovel).
- Dig for the Bunker: Start digging with the Shovel in the open area. Continue digging until you uncover a steel door that appears out of nowhere. This door leads to a hidden Maintenance A bunker.

After digging, you will see this steel door leading you to a bunker [Image Captured By Me] - Explore the Bunker: Climb down the ladder and proceed down the hallway. Near the end of the hallway, turn right and enter the room.
- Find the Laser Sight: On the computer desk inside the room, you’ll find the Laser Sight attachment for your pistol. Collect it to improve your weapon’s accuracy.

Collect your laser from the computer table [Image Captured By Me] - Additional Items: While in the bunker, you can discover other items like a Pennant Line Book, a Tuxedo, and a Firefighter Axe, which can be valuable additions to your inventory.
2. Silencer
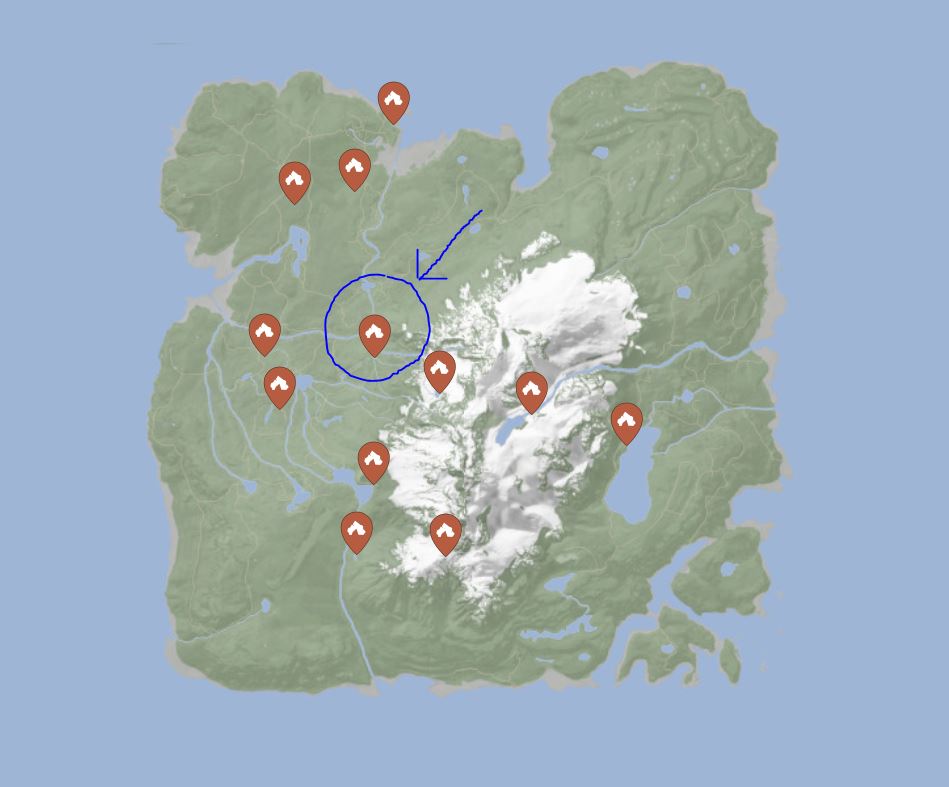
The Silencer can be found on the map location shown below.

- Open your inventory and equip the Shovel. If you don’t have a shovel, make sure to obtain one.
- Start digging in the middle of the low slope area to progress forward.
- Continue digging until the entire steel door is exposed.
- Open the Maintenance B bunker door, which is now accessible, and climb the ladder.
- Follow the linear path to your right.
- Enter the room on your right after walking in the shallow water.
- You will find the Silencer pistol attachment on the desk where a laptop is located.
- Additionally, you can collect some 9mm ammo for your pistol from this spot.
- Take both the Silencer and the ammo, and then exit the hideout.

3. Flashlight Attachment

- Locate the Cave Entrance: Find a cave entrance with three masked dead bodies nearby. These bodies indicate that you’ve found the correct cave for the flashlight.
- Enter the Cave: Proceed into the cave and explore its interior. Pay attention to corners and secret entrances as you progress.
- Prepare Equipment: Ensure you have the Rebreather and the Rope Gun in your inventory before entering the cave. You’ll need these items to explore the cave fully.
- Swim Underwater: As you reach the end of the cave, you’ll need to swim underwater to find the next opening. The path will split into two directions.
- Choose the Right Path: Take the right path, as it will directly lead you to the flashlight attachment. The left path leads to the shovel.
- Confront Mutants: Before getting the flashlight, be prepared to confront multiple aggressive mutants in the area. Eliminate them to secure the attachment.
- Collect the Flashlight: Retrieve the flashlight attachment from one of the deceased bodies.
- Exit the Cave: To exit quickly, head back to where you would find the shovel. You may need to deal with any remaining threats, such as sluggy creatures, to exit the cave safely.

Up Next:
- Sons of the Forest Companions.
- Sons of The Forest Hang Gliders.
- Guide: Sons of the Forest Server Hosting & Server.
Good job! Please give your positive feedback 😏
How could we improve this post? Please Help us. 💡
Talha is a games guide writer at VeryAli Gaming. He’s an expert in crafting guides based on walkthroughs and provide helpful tips and fixed to the readers. He loves to play AAA Titles like Starfield, Armored Core 6, God of War Ragnarok. Talha being a Computer Science student knows nits and bits of Gaming and error fixing. If you find yourself stuck at any point in the game Talha is your guy. Do check Talha’s Steam to learn more about his recent adventures.


