Legend of Zelda Tears of the Kingdom introduces over 30 major and minor bosses that can be fought for loot and story progression. Here’s where to find all Legend of Zelda Tears of the Kingdom bosses and how to defeat them.
Key Takeaways
- Legend of Zelda Tears of the Kingdom has 38 boss types, including major, minor, and minibosses.
- Five are the temple bosses: Colgera, Mucktorok, Queen Gibdo, Marbled Gohma, and Seized Construct.
- Besides that, there are also some significant bosses, such as Moragia, and some recurring ones, such as Master Kohga.
- Several minibosses, including the Hinoxes, Taluses, Flux Constructs, Molduga, Gleeoks, Yunobo, Lynels, Phantom Ganons, and the Froxes.
- Finally, there’s the Demon King Ganondorf, who has three phases. But you must fight his army with your companions before you fight him. His last stage is the Demon Dragon.
Temple Bosses
In Legend of Zelda Tears of the Kingdom, five Temples are guarded by a temple boss. Here are all of the temple Legend of Zelda Tears of the Kingdom bosses and how to beat them:
Colgera
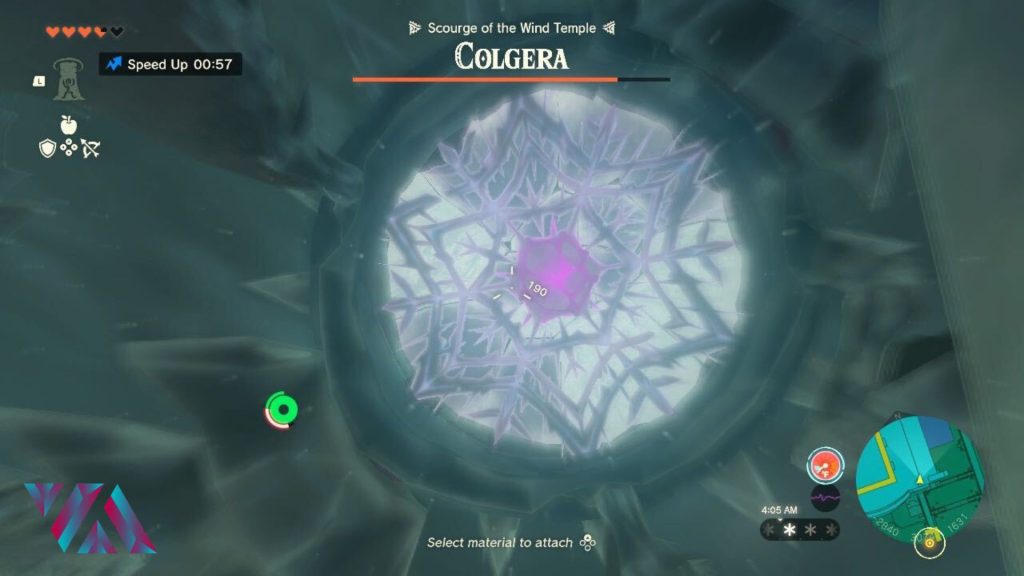
- Location: Wind Temple (-2860, 2995, 1517)
- Drops: Vow of Tulin, Sage of Wind, Heart Container
Colgera, also known as Scourge of the Wind Temple, is a central boss that you must defeat in the Wind Temple. This boss is a giant flying creature that has several weak spots. You will be airborne during the fight, meaning your regular melee attacks will become more challenging to land.
Phase 1
- In the first phase, target Colgera’s three exposed weak spots under its body.
- Hit each spot twice: once to break the outer shell and again to destroy it.
- Continue this for all three locations to advance to Phase 2.
- Beware of two attacks: the spike attack that exposes weak spots from above and the portal move that lets Colgera teleport around the arena.
Phase 2
- During the start of this phase, Colgera will enter a portal and come out from the other side, creating a massive tornado that you must dodge. As you avoid this tornado, another will slowly appear, eventually becoming three or even four tornados.
- Aim for Colgera’s three weak spots again. Except this time, you’ll need to hit the weak spots thrice.
- The tornadoes and Colgera’s increased speed make this much harder to handle. In this phase, Colgera also gains another move: the pincer attack. It will enter a portal and, coming out of the other side, shoot out sharp pincers.
Mucktorok
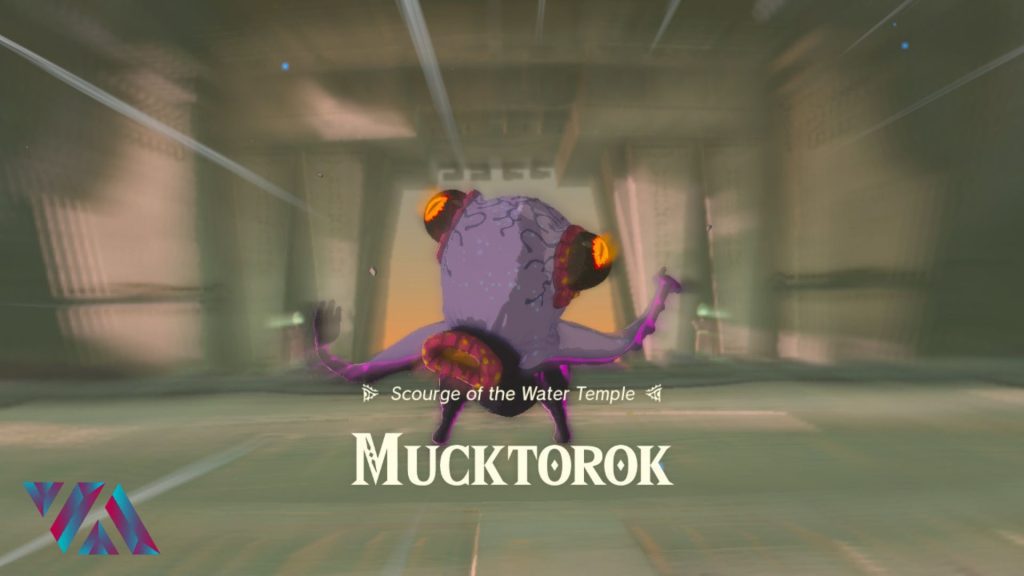
- Location: Water Temple (3365, 0750, 1742)
- Drops: Heart Container, Vow of Sidon, Sage of Water
Mucktrorok is the Scourge of the Water Temple and is an octopus-like creature that takes on many forms, including that of a Sludge Shark. This boss is best fought with Sidon’s Water Bubble, equipped with a spear weapon.
Phase 1
- Initially, you’ll fight Mucktorok as it switches between its true form and Sludge Shark form.
- In Sludge Shark form, it partially burrows and moves towards you, dealing damage.
- It can shoot a line of Sludge that follows you and jump and crash, releasing a Sludge wave you must jump over.
- Stun the Sludge Shark with your spear, stagger Mucktorok with hits, and engage in melee attacks.
- Once enough damage is dealt, Mucktorok enters its second phase.
Phase 2
- In this phase, Mucktorok turns back into the Sludge Shark and spits out Sludge, creating damaging pools that slow you down.
- Use a water-based ability like Chuchu Jelly to clear the Sludge.
- Attacks are similar to the previous phase, but two new moves are introduced.
- Mucktorok spits out drops of Sludge that spread across the arena, cleared with Chuchu Jelly.
- The Sludge Shark jumps around in the Sludge, making it a more elusive target
Queen Gibdo
- Location: Lightning Temple (-4532, -3625, 0027)
- Drops: Vow of Riju, Sage of Lightning, Heart Container
Queen Gibdo is the Scourge of the Lightning Temple and must be defeated to acquire the Vow of Riju. This boss is one of the temple Legend of Zelda Tears of the Kingdom bosses and can be quickly defeated with elemental offensive moves. You will have two encounters with Queen Gibdo.
Encounter 1
- Begin with elemental attacks by infusing your quiver with Shock Fruits for elemental damage.
- When Queen Gibdo becomes vulnerable, her body will have a white sheen, making her susceptible to physical attacks, especially melee ones.
- Recommended melee attacks include spinning hits with your hammer or sword.
- Queen Gibdo’s move set is limited, with her most potent move being the tornado summon, performed when she becomes vulnerable and turns white. She tends to follow you loosely but jumps away when white.
Encounter 2
- In the second encounter with Queen Gibdo, she repeats the same moves, but the arena changes.
- Dormant Gibdo Hives surround you this time.
- Once Queen Gibdo reaches 50% HP, the Gibdo Hives activate, dropping Gibdo minions.
- Your priority is to eliminate the Hives, making the Gibdo mobs immobile and removing them as obstacles.
- The rest of the boss fight remains the same, with Queen Gibdo being faster and more challenging to dodge.
Marbled Gohma
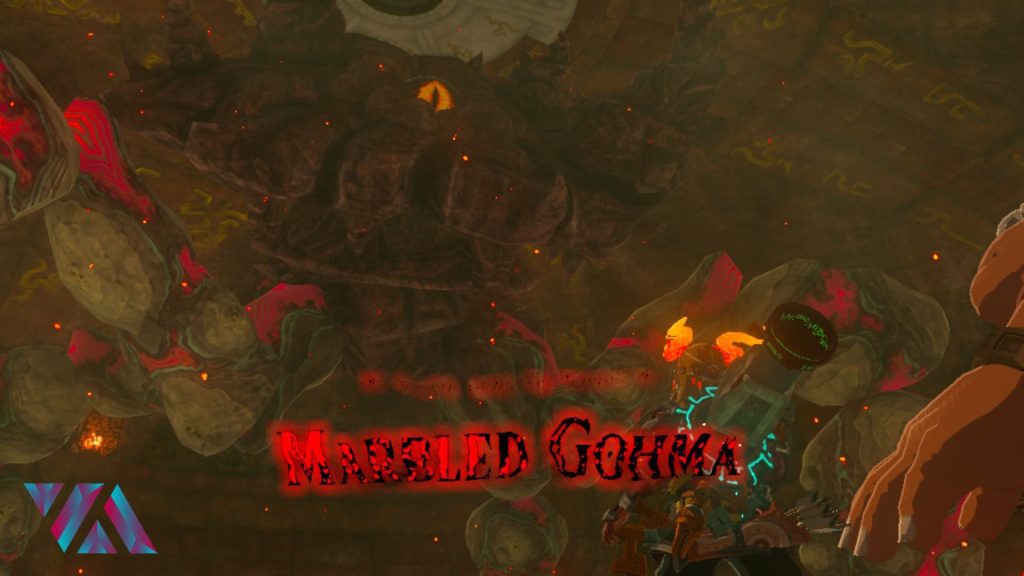
- Location: Fire Temple (1397, 2847, -0807)
- Drops: Vow of Yunobo, Sage of Fire, Heart Container
Marbled Gohma is another of the temple Legend of Zelda Tears of the Kingdom bosses you must take down. This boss is relatively easy to take down if you are good with positioning. Additionally, with Yunobo’s Charge ability, you can quickly eliminate this enemy. You get a Heart Container, among other loot, when you defeat it.
Phase 1
- In the first phase, Marbled Gohma spits out three rocks that explode after some time, giving you time to avoid them.
- It will also turn around and move weakly toward you if you get too far away.
- Focus on any two of its legs and use Yunobo’s Charge to stagger it, causing it to fall.
- While down, target its orange eye and keep hitting it until the boss pushes you away.
- Continue this strategy until Marbled Gohma reaches 50% health, triggering its second phase.
Phase 2
- In Phase 2, Marbled Gohma climbs to the ceiling and spits out exploding rocks to form a circle around you.
- To escape the rock circle, use the Recall ability to rewind time on one rock and pass through the space it left as it goes back up. Then, as the power deactivates, watch the rocks explode.
- You can only damage Marbled Gohma with two attacks: hitting its eye with a ranged weapon or using Yunobo’s Charge.
- Watch out for the Gohma spitting rocks in random directions.
- Continue hitting its eye, and Marbled Gohma will eventually be defeated.
Seized Construct
- Location: Spirit Temple
- Drops: Vow of Mineru, Sage of Spirit, Heart Container
The Seized Construct is the last temple boss that you will fight. Without spoiling too much, the arena is entirely different from previous temple bosses. For one thing, you start the fight riding a mech suit, and there’s Gloom all over the floor, meaning regular fighting strategies just won’t cut it.
Phase 1
- The battle starts with you in a mech suit within a limited arena, with Gloom covering the floor.
- The Construct has several attacks, including lunging its arm forward to strike you and firing plasma beams.
- Watch out for the electric rods move where it charges its arm ends and waves them while approaching or lunges at you with them extended. Dodge these attacks by side-stepping.
- After taking some hits, the Construct may appear to malfunction and jump to the opposite side of the arena. Continuously hitting it will eventually stagger it for a brief period.
Phase 2
- Phase 2 begins at 50% health with new arms for the Construct.
- It can hover above the Gloom floor.
- Fires two plasma balls, moves to the wall.
- Occasionally returns to the floor for old attacks.
- In the air, uses waving electric arms attack.
- When on the ground, unleash melee attacks.
Other Major Bosses
Besides the temple bosses, there are a few other significant bosses that you need to fight in Legend of Zelda Tears of the Kingdom.
Sludge Like
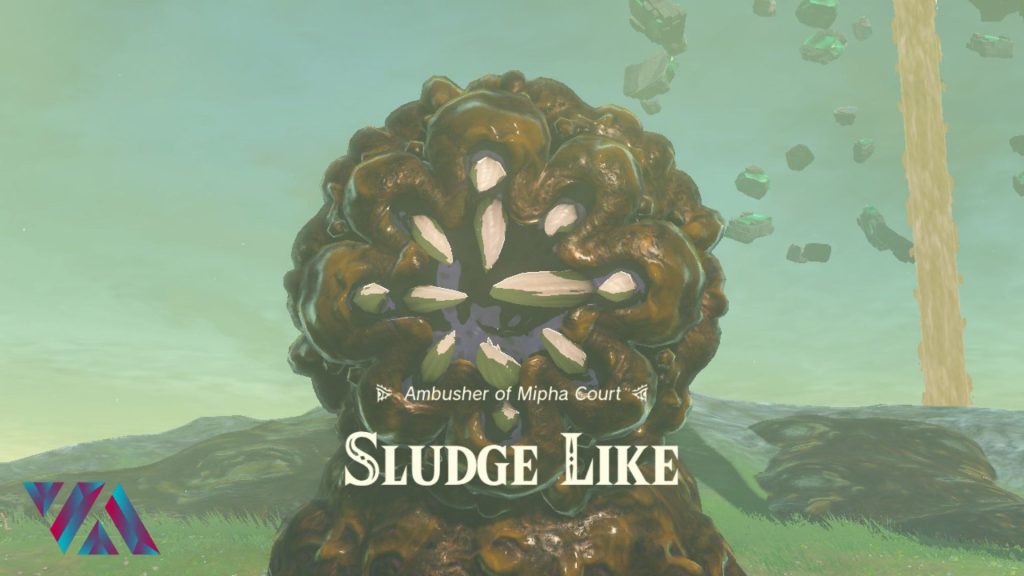
- Location: Lanayru Great Spring (Mipha Court)
- Drops: Royal Claymore
Sludge Like is a miniboss that you encounter in the Lanayru Great Spring. It can be fought when completing the Sidon of the Zora quest. This boss covers itself in Sludge, and the surrounding arena is also full of Sludge.
Strategy
- Start with Sludge Like covered in Sludge armor.
- Use water-based attacks to break the armor.
- Sludge Like has two moves: spitting Sludge and grabbing.
- Hit the weak spot during the grab attack to stagger it.
- The weak spot is a purple sac, use melee attacks on it.
Moragia
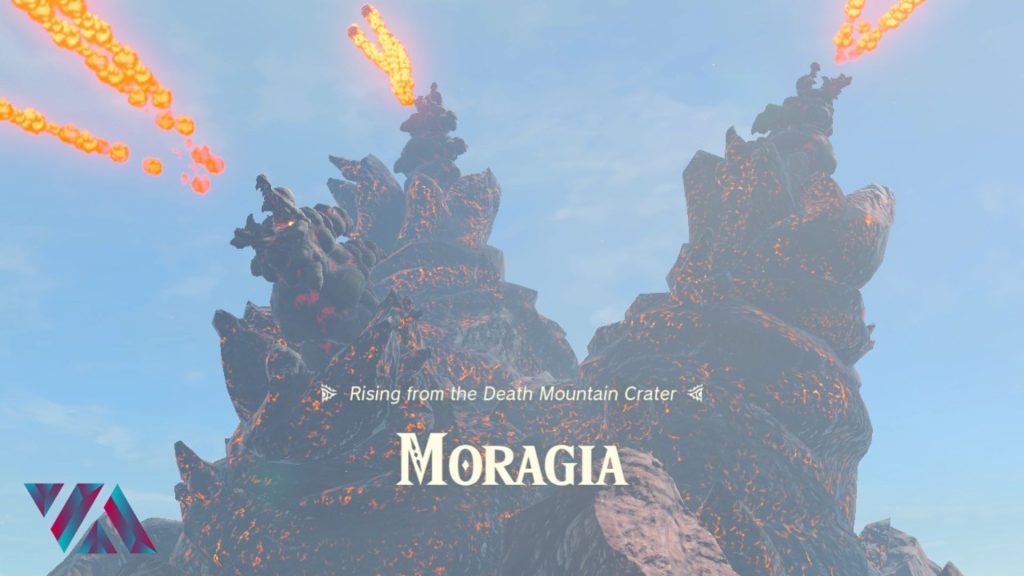
- Location: Death Mountain Crater
- Drops: None
Moragia is a behemoth made from the hardened magma within the Death Mountain Crater. It will surprise you when you reach the mountain, and you must use your Zonai Wing to get close to Moragia.
Strategy
- Release Zonai Wing and fly toward the magma golem.
- The golem has three faces on different peaks.
- Dodge fireballs and use Yunobo’s Charge on each face.
- One hit should destroy each face.
- Destroy all three faces to end the boss fight.
Master Kohga
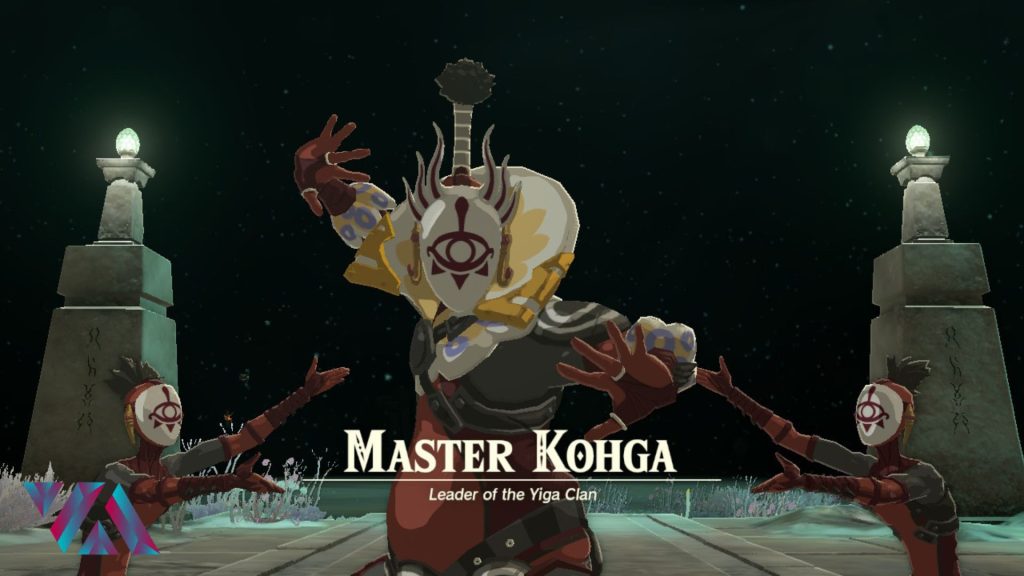
- Location: Great Abandoned Central Mine, Abandoned Gerudo Mine, Abandoned Lanayru Mine, Abandoned Hebra Mine
- Drops: Thunder Helm for completing Divine bEast Vah Naboris quest.
Master Kohga is one of the essential Legend of Zelda Tears of the Kingdom bosses you encounter four times. This boss is the master of the Yiga Clan and can be fought throughout the Yiga Clan questline. After each of the four encounters, you receive a Schema Stone.
First Encounter
- Both you and Master Kohga are on vehicles.
- Dodge his boulders by side-stepping.
- Climb Kohga’s truck when there’s an opening.
- Strike him to stagger him.
- Repeat until you defeat him.
Second Encounter
- Master Kohga rides an airplane.
- Use Tulin’s ability to catch up and strike him.
- Stagger him to continue the fight.
- Watch out for his missile attacks.
Third Encounter
- For your third encounter, you will have to fight Master Kohga on a boat. A couple of Yiga Ninjas now accompany Master Kohga. Using Yunobo’s Charge ability is highly recommended to take down the Ninjas.
Fourth Encounter
- Master Kohga controls a Zonai Construct.
- Arena is closed off by barbed wire.
- Boss has laser beams and mines.
- Hit mines with arrows or dodge them.
- Melee attack to end laser beams.
- Look for openings when the robot approaches you to attack Master Kohga.
Minibosses
Several minibosses in Legend of Zelda Tears of the Kingdom have lower HP and more straightforward battle strategies.
Taluses
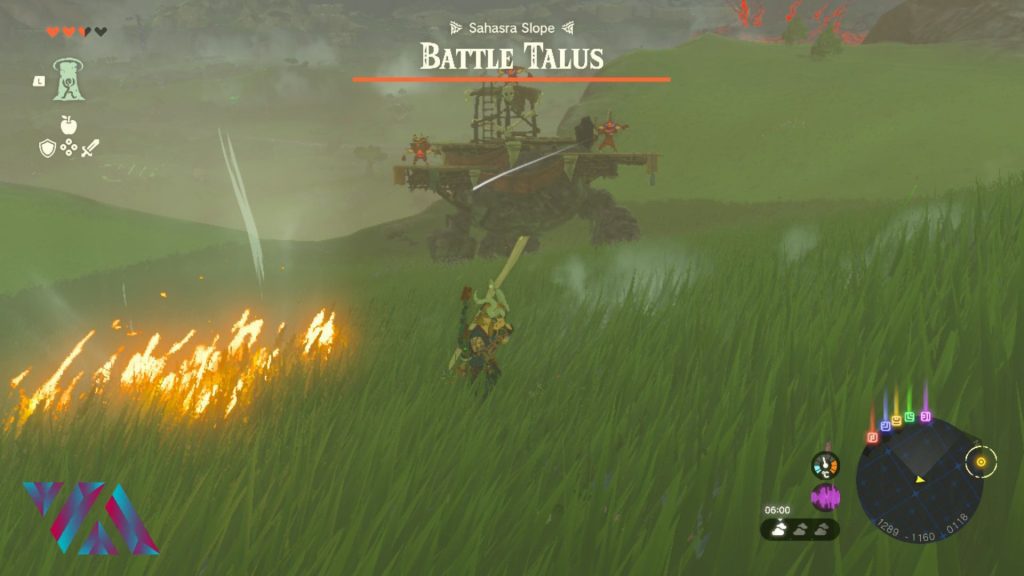
Taluses are giant creatures that take the form of their surroundings. They are the easiest Legend of Zelda Tears of the Kingdom bosses. There are six types of Taluses, the details of which are as follows:
| Talus Type | Locations | Drops |
|---|---|---|
| Stone Talus | Hyrule Depths | Amber, Flint, Opal, Ruby, Stone Talus Heart |
| Frost Talus | Selmie's Spot, Hebra Mountains, Hyrule Surface | Flint, Opal, Sapphire, Diamond |
| Luminous Stone Talus | Hyrule Surface, Hyrule Depths | Amber, Flint, Opal, Topaz, Luminous Stone, Diamond |
| Rare Stone Talus | Hyrule Depths, Hyrule Surface | Amber, Flint, Opal, Ruby, Topaz, Diamond, Sapphire |
| Battle Talus | Hyrule Field, Tabantha Frontier Depths | Amber, Flint, Opal, Ruby, Bokoblin Horn, Stone Talus Heart |
| Igneo Talus | Eldin Eastern Highlands | Flint, Opal, Ruby, Diamond |
Strategy
- Talus is a slow-moving target.
- Cannot be hit directly.
- Climb on it and hit the rock on its back or shoulder.
- Beware of Bokoblins on the Battle Talus.
- Focus on defeating Bokoblins first.
- Hit the black rock on the left shoulder to defeat it.
Hinoxes
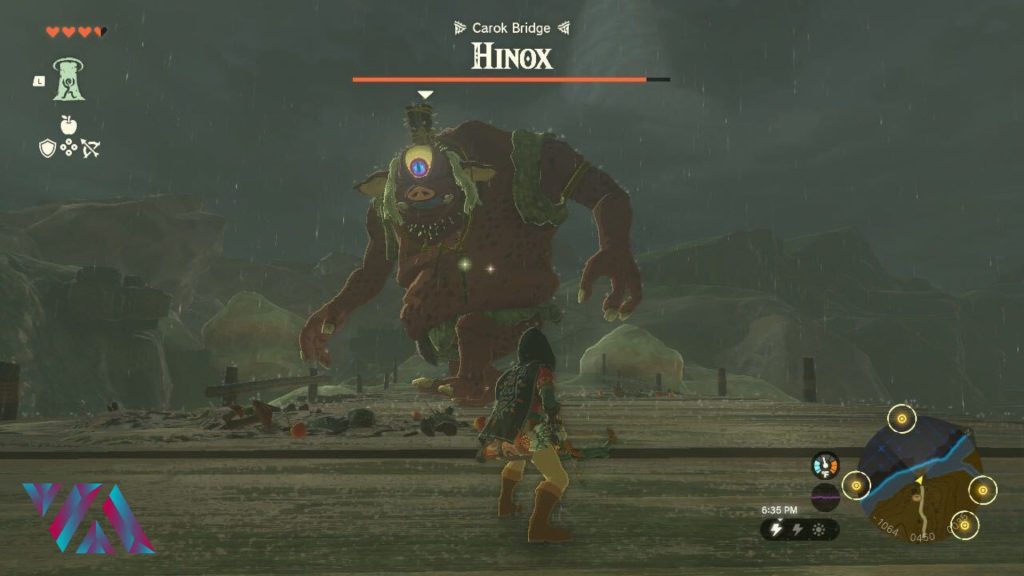
Hinoxes are Legend of Zelda Tears of the Kingdom bosses that you can beat early on in the game. There are three types of Hinoxes: Hinox, Black Hinox, and Blue Hinox. The difference between these is shown below:
| Hinox Type | HP | Locations | Drops |
|---|---|---|---|
| Hinox | 600 | Purifier Lake, Mount Taran, Tibio's Hollow, Kama Plateau, Phalian Highlands, Kincean Island, West Loshlo Harbor | Hinox Toenail, Hinox Guts, Seared Gourmet Steak, Roasted Bird Drumstick, Hinox Horn, Hinox Tooth, Seared Steak, Seared Prime Steak, Roasted Bird Thigh, Roasted Whole Bird |
| Blue Hinox | 800 | Seres Scablands, Eventide Island, Talus Plateau, Herin Lake, North Hyrule Castle, Ja'Abu Ridge, Aldor Foothills, Thyphlo Ruins, Digdogg Suspension Bridge, Ralis Pond, West Hyrule Plains, South Akkala Plains, Applean Forest, Trotter's Downfall, East Ranch Ruins, Uten Marsh | Hinox Toenail, Hinox Guts, Seared Gourmet Steak, Roasted Bird Drumstick, Blue Hinox Horn, Hinox Tooth, Seared Steak, Seared Prime Steak, Roasted Bird Thigh, Roasted Whole Bird |
| Black Hinox | 1,000 | Lake Totori South, Tabahl Woods, Tempest Gulch, Giant's Forest, East Gut Check Rock, Rabella Wetlands, Hebra West Summit | Hinox Toenail, Hinox Guts, Seared Gourmet Steak, Roasted Bird Drumstick, Black Hinox Horn, Hinox Tooth, Seared Steak, Seared Prime Steak, Roasted Bird Thigh, Roasted Whole Bird |
Strategy
- Hinoxes are giant monsters.
- They move at a moderate pace.
- Shoot projectiles and hit the ground.
- Aim at the giant eye to stagger it.
- It falls over and becomes vulnerable.
- Be cautious as it covers its eye and moves faster at low HP.
- Precise aiming and dodging are crucial.
Stalnox
- Location: Hyrule Castle Underground, Eastern Daval Peak, North Aris Beach, Satori Mountain, East Hyrule Castle, Rowan Plain, East Akkala Plains, Harfin Valley, Icefall Foothills, Hickali Woods
- Drops: Hinox Tooth, Stalnox Horn
The Stalnox is quite similar to the Black Hinox except for its design, which has a more skeletal theme. It can be found relatively early in the game, and you can take it out with pretty much the same strategy as the Black Hinox.
Strategy
- Giant skeleton that chases you.
- Hit the eye to stagger it.
- Approach and attack after staggering.
- At 50% HP, its eye pops out.
- New health bar for the disembodied eye.
- Hit and defeat the eye.
- Watch out for Stalnox’s melee attacks.
- Stalnox falls and dies after defeating the eye.
Phantom Ganon
- Location: After destroying Gloom Hands
- Drops: Dark Clump
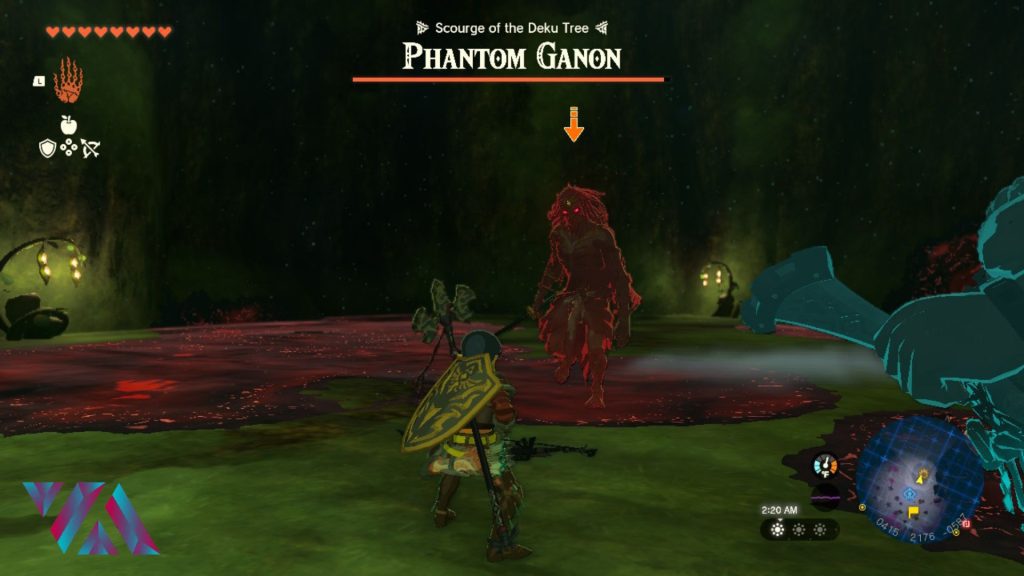
The first Phantom Ganon can be found in the Deku Tree Chasm right after you beat a Gloom Hands spawn. The second one is in the Hyrule Castle. This enemy recurs throughout the game, spawning several specters you must simultaneously take on.
Strategy
Deku Tree Chasm:
- Face one Phantom Ganon.
- Watch out for spinning slash, slow dash and slash, close-ranged slash.
- Avoid Gloom on the floor; it damages you.
- Phantom Ganon creates expanding Gloom pools; hitting it shrinks the pool.
- If Phantom takes no damage, the pool reappears.
Hyrule Castle:
- Face five Phantom Ganons.
Flux Constructs
- Location:
- Flux Construct I: West Hebra Sky Archipelago, Gerudo Highlands Depths
- Flux Construct II: Akkala Highlands Sky, Mount Lanayru Depths, Lanayru Sky Archipelago, South Hyrule Sky Archipelago
- Flux Construct III: Sky Archipelago, Central Hyrule Depths
- Drops: Large Zonai Charge, Zonai Charge
Flux Constructs are common Legend of Zelda Tears of the Kingdom bosses. There are three Flux Constructs (Flux Construct I, II, and III). The key to finishing off Flux Constructs is to target the weak spot in their core.
Strategy
- Hit the glowing rock in the center with an arrow to make it vulnerable.
- Damage it with melee attacks or use Ultrahand ability to scatter blocks and deal melee damage to the Flux core.
- Beware of homing attacks where the Construct chases and smashes the ground.
- Watch for flying attacks where it throws down cubes from its body.
- Differences between Constructs are in speed and damage.
Molduga
- Location: Gerudo Desert
- Drops: Molduga Guts, Molduga Fin, Molduga Jaw
The Molduga is a sand-burrowing creature that gradually chases you and becomes a menace since it’s practically immune when underground. There are a total of four Molduga you must defeat to acquire the Medal of Honor: Molduga.
Strategy
To defeat Molduga in the desert:
- Molduga stays underground, following you.
- Use explosives like Flower Bombs to get its attention.
- Exploding bombs while it’s in the air staggers it.
- Attack with melee weapons while it’s on the surface.
Yunobo
- Location: Hyrule Surface
- Drops: None
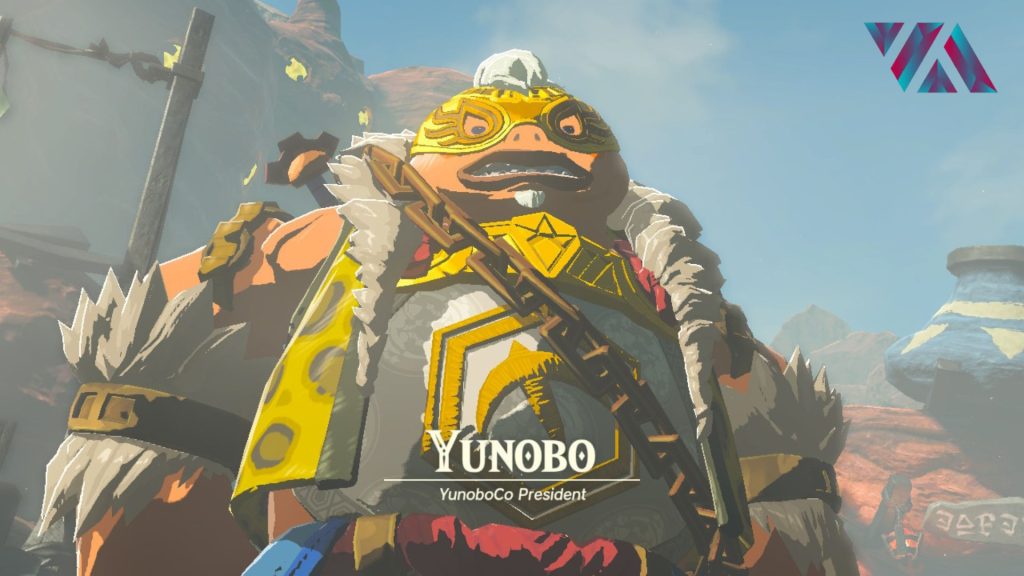
Interestingly, Yunobo also appears as a miniboss in Legend of Zelda Tears of the Kingdom. He uses his abilities, especially the charge ability, against you. Yunobo, luckily, doesn’t have a lot of HP and can even be defeated in two hits. But it’s dodging his attacks that is challenging.
Strategy
- Yunobo only has one move: the charge attack. In this, he rolls into a ball to telegraph the attack. Then, he shoots towards you quickly. Hit him with your arrow or melee weapon thrice to break the spell he’s under and end the fight.
Flame Gleeok
- Location: Lake Hylia, Eldin Canyon, Spectacle Rock, Ancient Columns
- Drops: Gleeok Flame Horn
Gleeoks are classic Legend of Zelda Tears of the Kingdom bosses. They present as three-headed dragons that each specialize in a specific element. This one, in particular, deals with fire damage.
Strategy
To defeat the Flame Gleeok:
- Target its three heads and deplete their health bars.
- Stagger the Gleeok to land melee attacks on the heads.
- The boss will rise and shoot fireballs; repeat the process.
- Watch out for its wing attack with gusts of wind.
Frost Gleeok
- Location: Tabantha, Gerudo Mountain Peak
- Drops: Gleeok Frost Horn
The Forst Gleeok is a close cousin to the Flame Gleeok. However, this Gleeok deals ice damage. Other than that, there are slight changes to its move pool, but the strategy is the same.
Strategy
- The Frost Gleeok follows the same strategy as the Flame and Thunder Gleeoks. It can generate powerful gusts to push you away while shooting ice-cold beams from its mouth. Interestingly, two heads can simultaneously shoot ice beams this time.
- Once its HP falls below 40%, it will fly up into the air and shoot three beams, creating a blizzard above you. The blizzard will drop icicles you can climb to reach the top and hit the Gleeok’s heads to finish it off.
Thunder Gleeok
- Location: Lake Herin, Colosseum Ruins, Akkala Citadel
- Drops: Gleeok Thunder Horn
The Thunder Gleeok is a powerful miniboss in three places in the game. It deals thunder damage and can be beaten with the same strategy as the other Gleeoks.
Strategy
To defeat the Thunder Gleeok:
- Follow the same strategy as with the Flame Gleeok.
- Be cautious of its lightning bolt attacks.
- When its HP drops below 40%, use air gusts to glide and attack the heads to finish the battle.
King Gleeok
- Location: Gerudo Desert, Great Hyrule Forests Depths, Hebra Sky, Necluda Sky
King Gleeoks deal all three kinds of elemental damage: fire, ice, and thunder. These can be found in four locations but are very hard to access.
Strategy
To defeat King Gleeok:
- Utilize the pillars for cover from its elemental attacks.
- Stagger each head with ranged attacks and follow up with melee attacks.
- When it reaches 40% HP, ride the air drafts to reach it in the air and attack its heads to defeat it.
Froxes
- Location:
- Frox: Gerudo Highlands Depths, Central Hyrule Depths
- Blue-White Frox: Hebra Mountain Depths, Tabantha Frontier Depths
- Obsidian Frox: Gerudo Highland Depths, Central Hyrule Depths
- Drops: Zonaite, Large Zonaite, Frox Guts, Large Crystallized Charge, Frox Fang, Frox Fingernail
The Frox is a giant toad-like creature with a singular eye and black ore on its back. This boss is relatively easy to take down if you focus on the ore on its back. Three types of Froxes can be found in Legend of Zelda: Frox, Blue-White Frox, and Obsidian Frox.
Strategy
To defeat the Frox:
- Watch out for its vacuum and slam attacks.
- Use explosives like Flower Bombs to stagger it when its mouth is open.
- Target the black crystal warts on its back or damage its singular eye to stagger it and then deal damage.
Lynel
- Location:
- Red-Maned: West Hyrule Plains, Deep Akkala, Rabia Plain, Lake Illumeni
- Blue-Maned: Lanayru Heights, South of Hebra West Summit
- White-Maned: Ukuku Plains, Kamah Plateau, Risoka Snowfield
- Silver Lynel: Nautelle Wetlands, Tama Pond
- Drops: Lynel’s Saber Horn, Lynel’s Mace Horn, Lynel Shield, Lynel Bow.
Lynels are centaurs that have been borrowed from Breath of the Wild. There are four types of Lynels in Tears of the Kingdom: Blue-Maned, Red-Maned, White-Maned, and Silver-Maned.
Strategy:
- The centaurs are extremely fast and require a lot of practice to take on.
- However, once you learn the attack patterns and how they move, Lynels become extremely easy to kill. It would be best if you focused on dodging and landing Flurry Attacks.
Final Boss: The Demon King
The final boss in Legend of Zelda Tears of the Kingdom is the Demon King Ganondorf. This is one of the hardest Legend of Zelda Tears of the Kingdom bosses. The boss itself has three phases. But you must fight his strong army before you can get to the Demon King. Here’s how to beat the Demon King and his army.
The Demon King’s Army
First, you’ll need to fight Ganondorf’s army. His army will approach, and your companions will come to your aid. After a short cutscene, you must take down the Demon King’s Army.
To defeat the enemy army:
- Use Area of Effect (AoE) attacks like Flower Bombs for explosive damage.
- There are basic attacking units and slightly bigger, slower minions. Eliminate all minions using the health bar at the top of the screen as a reference.
- When the enemy army is down to 25% HP, faster-moving swordsmen will appear. Use a Flower Bomb to take them out.
Ganondorf, The Demon King
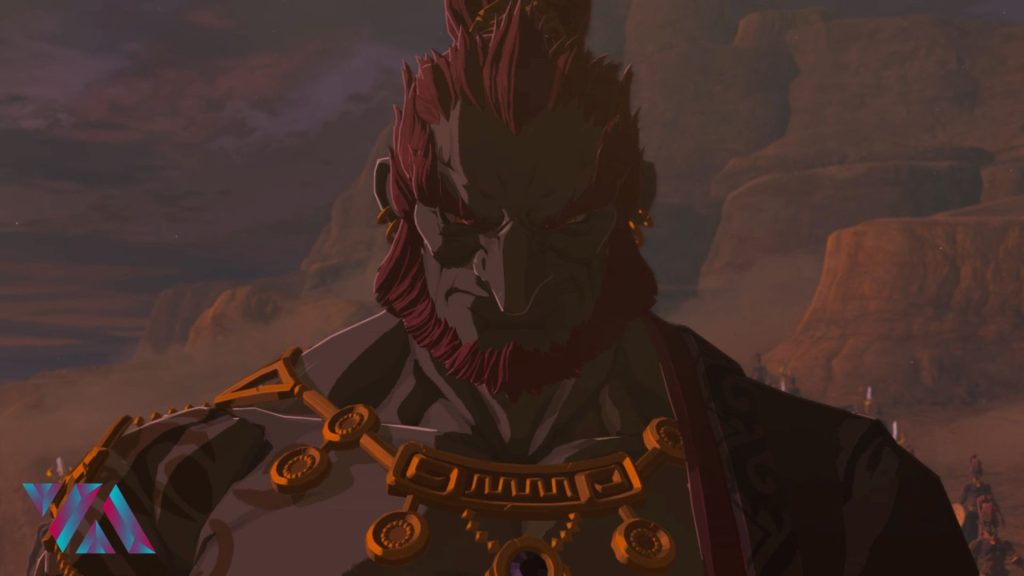
After killing the Demon King’s Army, you’ll have to face the Demon King himself: Ganondorf. This is among the hardest Legend of Zelda Tears of the Kingdom bosses. During his first phase, he performs close and long-range attacks in his regular swordsman form.
To defeat Ganondorf’s first phase:
- Dodge his sword strikes, which he telegraphs by holding his sword to the side.
- Watch out for his Gloom-imbued attack, signaled by Gloom emanating from his body.
- Dodge his lunging attack with a sword spin, which he telegraphs by spinning his sword above his head.
- Dodge his attacks to trigger a melee flurry rush and rapidly deplete his health, defeating his first phase.
Demon King Phase 2
Ganondorf’s next phase sees him transform into a more powerful being. After that, he will summon some phantoms to aid him in battle. As such, you can also use your companions to fight off his ghouls.
In Ganondorf’s second phase:
- He adds new moves like a ground strike with three waves fanning out, a forward sword thrust in a line, creating gusts of wind that push you upward while dealing area damage, and a slam attack where he jumps toward your position and strikes the ground.
- It’s best to start by taking down his phantoms before focusing on the real Demon King.
- Be cautious as he follows you and attacks.
- When his health falls to 50%, his phantoms disappear, and he gains new moves like sending out three red wisps that move toward you and unleashing multiple waves of Gloom that you must navigate between.
Demon Dragon
The Demon King will transform into a giant dragon for his final phase. This phase may seem scary but don’t get intimidated. Link will start stuck between its lower teeth. Another dragon, the Light Dragon, will appear to save Link, and you just now ride this dragon to defeat the Demon Dragon.
To defeat the Demon Dragon, follow this strategy:
- Jump from the Light Dragon to hit the red scales of the Demon Dragon with melee attacks, and you’ll return to the Light Dragon.
- The Demon Dragon has a simple move pool, including a fireball attack where he rains fireballs from the sky and shoots fireballs straight at Link.
- Use your paraglider to dodge these attacks, as you can’t move much on the Light Dragon.
- Avoid getting too close to the Demon Dragon to prevent the Gloom status debuff.
- Keep attacking the Demon Dragon’s red scales, and it will be defeated in no time.
Final Thoughts
If you love fighting new enemies with unique gameplay mechanics, you’ll love the 30+ Legend of Zelda Tears of the Kingdom bosses.
There are five temple bosses, along with several optional bosses. Some recurring bosses include Master Kohga, Hinoxes, Taluses, Froxes, and Phantom Ganons. Finally, the big and evil Demon King has three phases plus an army to defeat.
Check out our official guide to learn more about Legend of Zelda Tears of the Kingdom’s abilities.
For a complete walkthrough on the fourth shrine, head over to our fourth shrine walkthrough.
Good job! Please give your positive feedback 😏
How could we improve this post? Please Help us. 💡
An enthusiastic writer who loves art and gaming, you can find Maaz casually spending his day either behind the keyboard or the canvas. Maaz holds a major in Electronics and has over 5 years of experience working as a freelance blog and content writer. He loves to talk about all things gaming and help other gamers through his guides. He’s an expert when it comes to Diablo 4, Elden Ring, Dark Souls, Starfield and Baldur’s Gate 3.
Maaz mostly plays games on PC, you can check out his library on Steam attached below:


