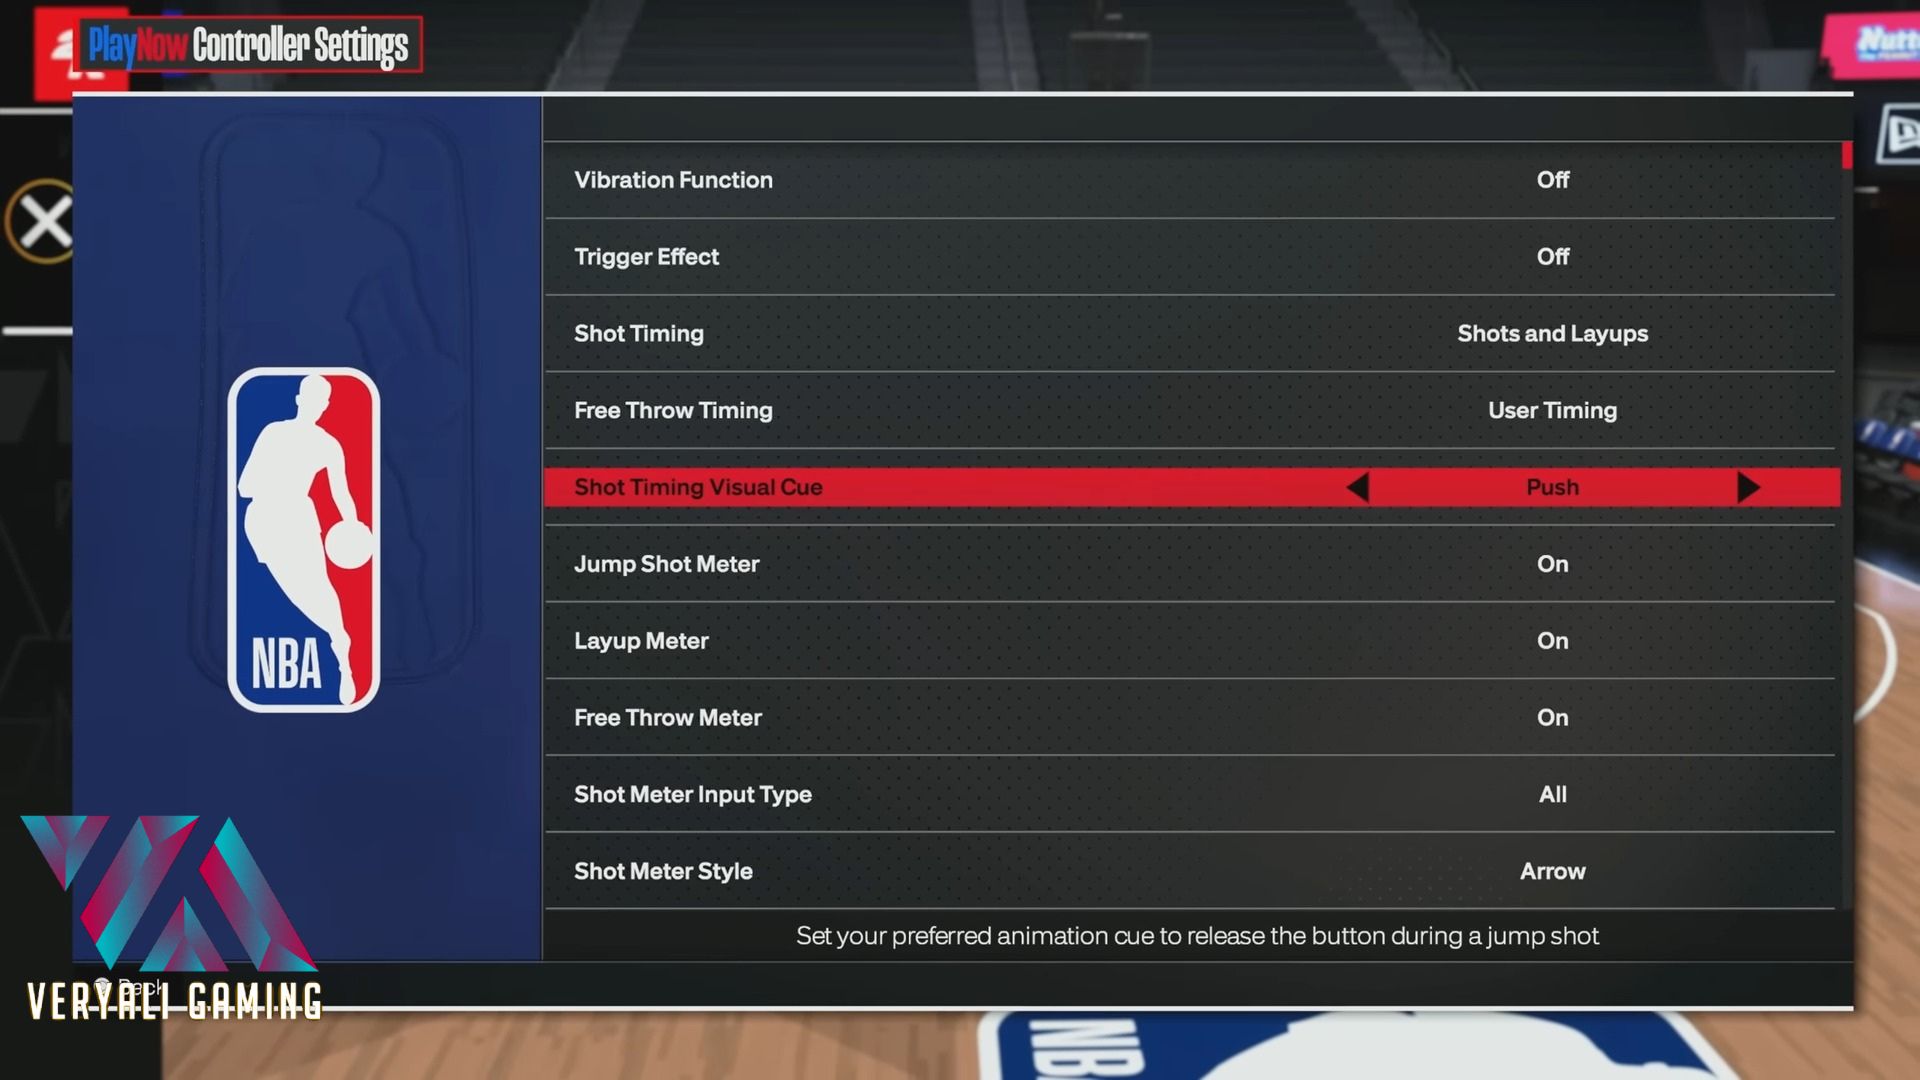
The new mechanism that NBA 2K24 has introduced to the shooting method is the new shot timing visual cue setting. While this may differ from the shot mechanism of NBA 2K23, it still is not that hard to get around. In this guide, you’ll explore this feature in detail.
Key Takeaways
- The shot timing visual cue In NBA 2K24 settings impacts the time you must release the shot button to green time a shot.
- This setting is based on the player’s visual cues.
- There are a total of four options: Jump, Set Point, Push, and Release.
- The best option is determined by preference.
Shot Timing Visual Cue Settings

First, to reach this settings option, you need to:
- Press the settings button and hover over the options menu
- Select the controller settings option
- Go down till you spot the shot timing visual cue
- Now you can change the option to your preference
You can pick four options to change the timings of your button release to green time the shot. The four options are Jump, Set Point, Push, or Release. The shot timing visual cue is a much better mechanic compared to previous years.
Your shooting now depends on the 4 visual cues you can spot while your player takes the shot. Timing your shot is of high importance as it can better your game as you take more shots that go in. To green time a shot, you need to release the shoot button as soon as you see the visual cue that you have chosen.
The four options are spread with different times till you can release your button, with Jump taking the shortest amount of time while releasing with the longest time.
- Jump: Release the shooting button as soon as you see your player make the jump for the shot.
- Set Point: Release the shooting button as soon as you see your player is done setting up the shot.
- Push: Release the shooting button as soon as you see your player pushing the ball out of his hands for the shot.
- Release: Release the shooting button when you see your player letting the ball go from his hands.
Best Option
Now, the best setting is entirely dependent on your preference. However, there is a way to help you determine the best option. The shooting mechanic depends entirely on how fast your reflexes are and what visual cue you are the most comfortable with. You can try out each setting by selecting it and shooting with it to find which suits you the best.
Suppose you need help with an option. Then, notice if you are either releasing the button too early or too late and then changing the settings based on that.
You will find the option you are the most comfortable with, then practice with it to perfect green timing your shots to improve your overall game. Usually, the Middle two options, Setpoint and push, are preferred as they are both too fast and too early, but your preference can be any one of them.
Now that you know what each of the options does. You can practice and find out your preferred settings and remember to have fun while doing it.
If you enjoyed this guide, then check out more guides on NBA 2K24:
Good job! Please give your positive feedback 😏
How could we improve this post? Please Help us. 💡
Nauman Shah is a VeryAli’s Guide Writer. With a background in Software Engineering along with immense love for video games and three years in Unity 3D games development, Nauman joined the writing media to share his thoughts around the world. Moreover, he likes to smash people with difficult questions on social media and watch shows with a cat named ‘Blep’.
Nauman primarily plays RPG and Open World Games – His Gamer Tag is #Sammich. You can check his gaming library and connect with him!


