The Handler is the starting Archetype for Remnant 2 Players. It is the only class that features a companion that helps players take on multiple enemies in an area. The Handler Build synergizes with the Engineer Archetype and deals tremendous damage to Bosses and Mini-Bosses, and I call it the Hengine.
I have invested more than 30+ hours in Remnant 2, dealing with various character builds. You can easily trust my information related to the best Handler Build in Remnant 2!
Key Takeaways
- You can use any of the two as your Primary Archetype, as it does not matter.
- The Handler can be used for his healing buffs and companion, whereas the Engineer deals significant Damage Per Second to the opponents.
- The Technician Set works best with the Build, which hasn’t disappointed me so far.
- Matriarch’s Insignia and Energized Neck Coil will serve as the optimal Amulets for Hengine.
- Dense Silicon Ring, Fire Stone, Stone of Balance, and Momentum Driver are your go-to Rings.
- Labyrinth Staff is used as a melee weapon due to its significant AOE damage and, combined with Vengeful Strike, increases the Melee Damage by 20% when below 50% Max Health.
- Blackmaw AR-47 with the Healing Shot has a sweet Damage Per Second. You can combine that with the MP60-R with the Hot Shot to deal insane damage.
Remnant 2 Best Handler Build
Best Archetype For Team Play
Why I Choose Handler?
The handler is built for cooperative play, and it’s the only archetype with a Companion to help you in battle. It features various healing and other support abilities to buff up your or your teammate’s damage.
The Handler Archetype can be selected from the main screen before you start Remnant 2. It is the only class that features a companion that aids you in battle.
The Engineer Archetype, however, can not be selected at the start of the game. Hence, players need to unlock the Archetype. The good news is you can search for the Engineer Archetype in N’erud. You can read the Remnant 2 Engineer Archetype guide as a walkthrough to unlock the Technician Armor Set and the Engineer Archetype.
Once you have both Archetypes under your wing, you can create the Best Handler Build in Remnant 2.
Why must players opt for Hengine? The answer to that question can be answered in two ways: you get a healer on your side and an insane damage-dealing weapon skill (credits to the Engineer).
The overclock skill on the Vulcan grants infinite ammo, increased fire rate, and a 25% damage increase for 15s. That’s enough for you to shed half the HP of any boss you encounter.
The Handler
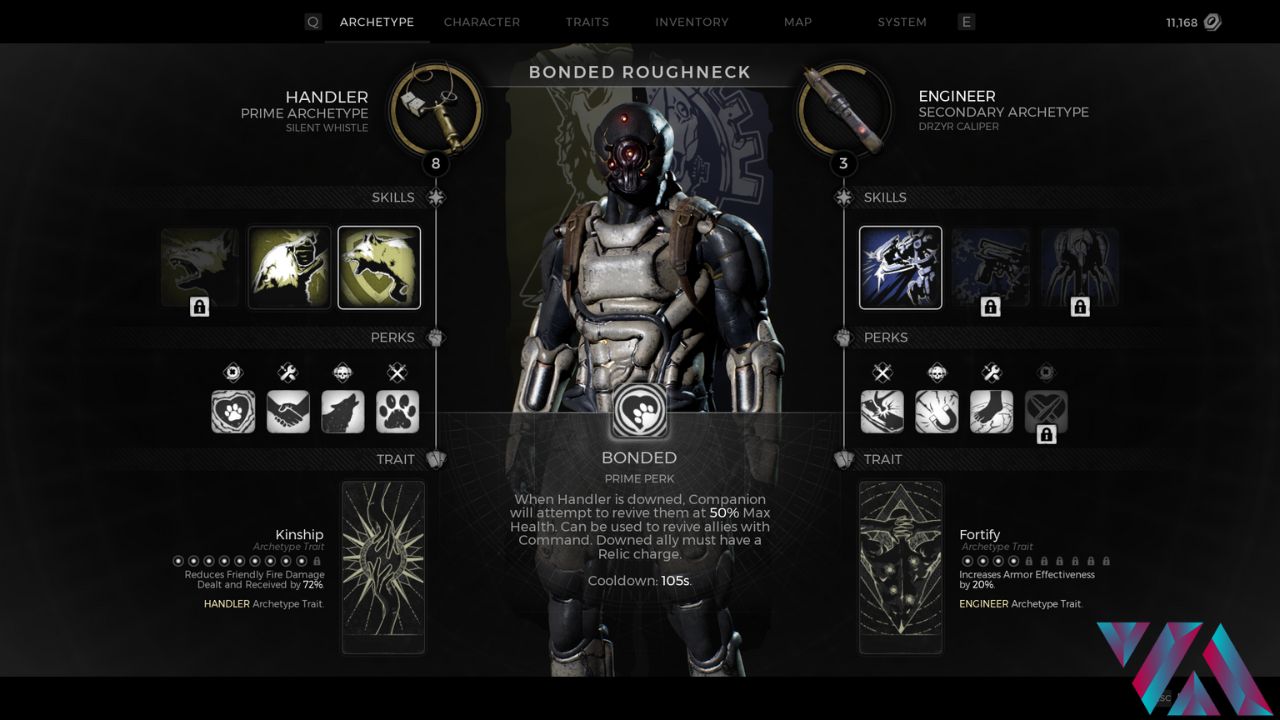
The Prime perks and skills for Handler allow players to get back on their feet after a knockout AND have a companion aid them in battle. Furthermore, they can provide heal buffs, damage reduction, increased movement speed, Stamina Reduction, and more that can help you in tough spots.
Skills
| Skills | Description |
|---|---|
| Guard Dog | Companion will follow the Handler and generate 15% increased Threat while attacking. All damage to them is reduced by 20%. Single tap: Companion engages enemies near the targeted location. Double Tap: Companion returns to the Handler and remains by their side. Hold: Howl reduces damage by 15% to all allies within 20m and the Companion generates additional Threat that lasts 20s. Cooldown is 88.2s |
| Support Dog | Companion will follow the Handler continuously heal allies within 3.5m for 0.25% of Max Health per second. Single Press: Companion engages enemies near the targeted location. Double Tap: Companion returns to the Handler and remains by their side. Hold: Howl grants 2% of Max Health per second and 25% increased Movement Speed to all allies within 20m and lasts 25s. |
| Attack Dog | Companion will follow the handler and deal 20% additional damage. |
Perks
| Perks | Description |
|---|---|
| Pack Hunter | Gain 24% Ranged and Skill Damage, and 5% Ranged and Skill Critical Chance while Companion is active and within 40m of the player. Damage increases with Handler Level. |
| Spirit of the Wolf | Increases Movement Speed by 10%. All allies within 10m of the Handler gain the Handler's Movement Speed (if faster). Reduces the Stamina Cost of actions for allies by 15%. |
| Teamwork | Handler and companion gain 30% increased Revived Speed. While Handler or Companion are reviving, they receive 50% less damage. |
| Best Friend | Using a Relic fully restores the Companion's health. |
The Engineer
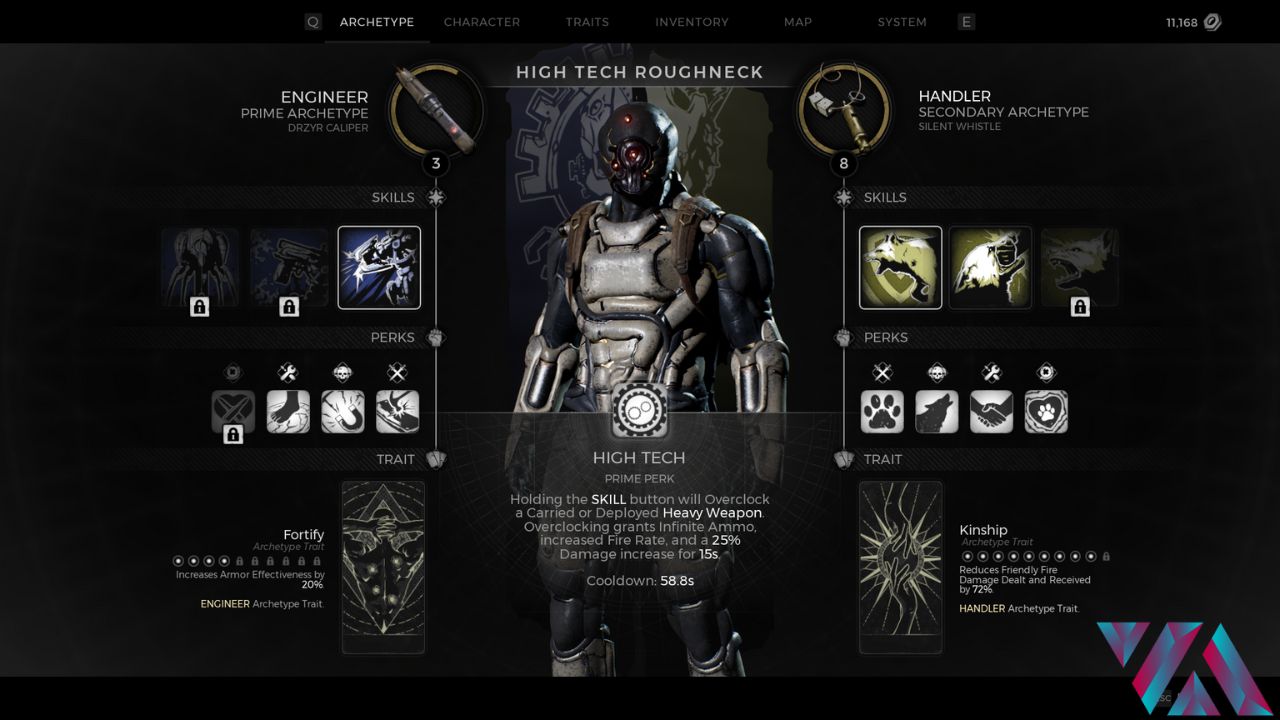
Here’s where it gets tricky. You can’t unlock the Engineer Archetype before progressing through N’erud, and you can’t select it at the start of Archetype Selection. To unlock the Technician set and the Engineer Archetype, you must roam the corners of the N’erud world and face the area’s toxic air.
There is no exact location on the map I can show you. Therefore, only through exploring the area will you find the items. To better understand this particular side mission, check out my guide on the Engineer Archetype!
The Engineer will play a significant role in building the Hengine. With its amazing skill set and weaponry, you’ll easily deal immense damage to the big bosses. While you’re up against the major bosses in Labyrinth, Yaesha, and Losomn, you’ll find the perks of Engineer deadly and sharper than the edge of a knife.
Skills
| Skills | Description |
|---|---|
| Heavy Weapon: Vulcan | Press: Deploys a Vulcan Cannon Turret which lasts until its Ammo is exhausted. Turrets that can aim will prioritize targets that the player Aims at. Press SKILL again to enable autonomous targeting. Hold: Deploys to Heavy Carry Mode. If engineer Prime is available, will Overclock the weapon if already in hand or on the battlefield. Double Press: The weapon is reclaimed, returning 75% of its remaining Ammo. Heavy Weapon Ammo is regenerated by 1.02% every second, and Heavy Weapons can only be deployed if at least 25% Ammo is available. |
| Heavy Weapon: Flame Thrower | Press: Deploys a Flamethrower Turret which lasts until its Ammo is exhausted. Turrets that can aim will prioritize targets that the player Aims at. Press SKILL again to enable autonomous targeting. |
| Heavy Weapon: Impact Cannon | Press: Deploys a Impact Cannon Turret which lasts until its Ammo is exhausted. The description for each Skill is the same but with different effects. |
Perks
| Perks | Description |
|---|---|
| Metal Worker | Increases Skill Damage by 15% and Heavy Weapons gain 15% Ammo Capacity and 7.5% Max Health. |
| Magnetic Field | Heavy Weapons grant 15% Damage Reduction to all allies within 2.5m. |
| Heavy Mobility | Movement Speed while Carrying a Heavy Weapon is increased by 35%. |
| Surplus | Using a Relic refills 15% of Heavy Weapon Ammo. Bonus is doubled when Heavy Weapon is stowed. |
Amulets
For this Build, the two Amulets you’ll be focusing on are the “Matriarch’s Insignia” and the “Energized Neck Coil.” These Amulets help with status effect damage and melee damage.
Matriarch’s Insignia
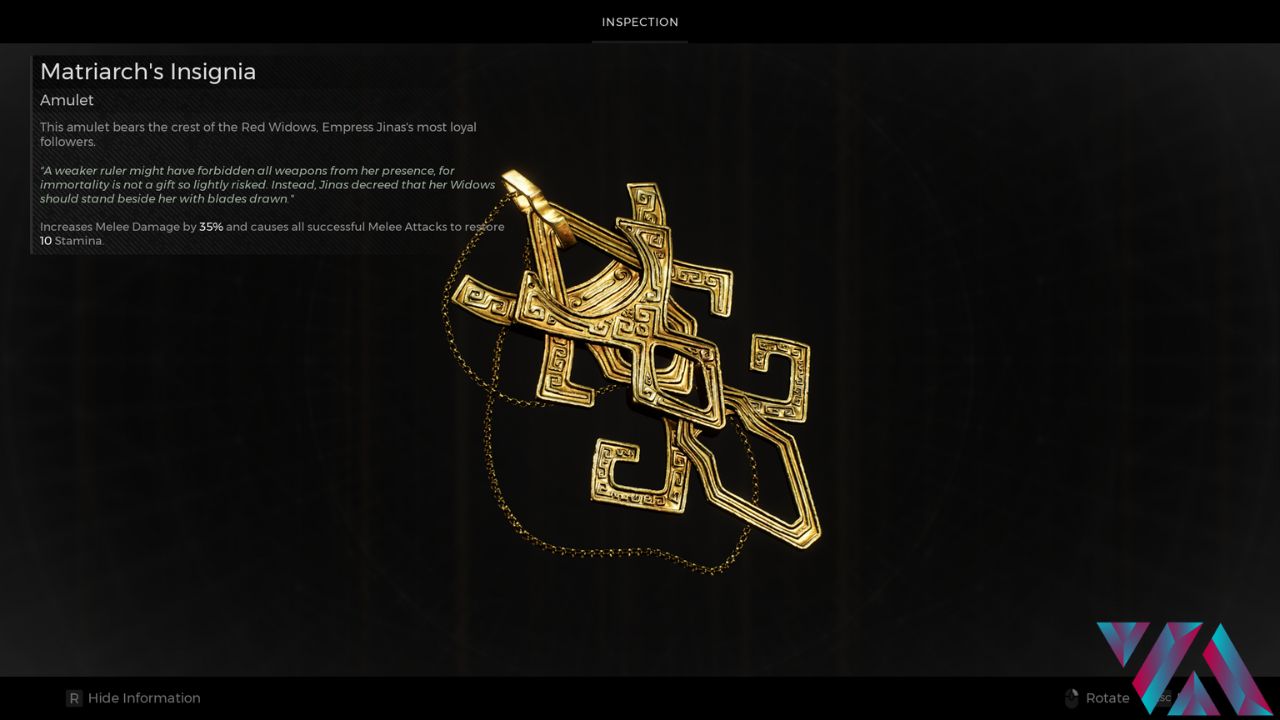
- The Insignia can be obtained from the Yaesha World.
- It pairs perfectly with the Labyrinth Staff.
- The Amulet increases Melee Damage by 35% and restores Stamina with every successful hit.
Energized Neck Coil
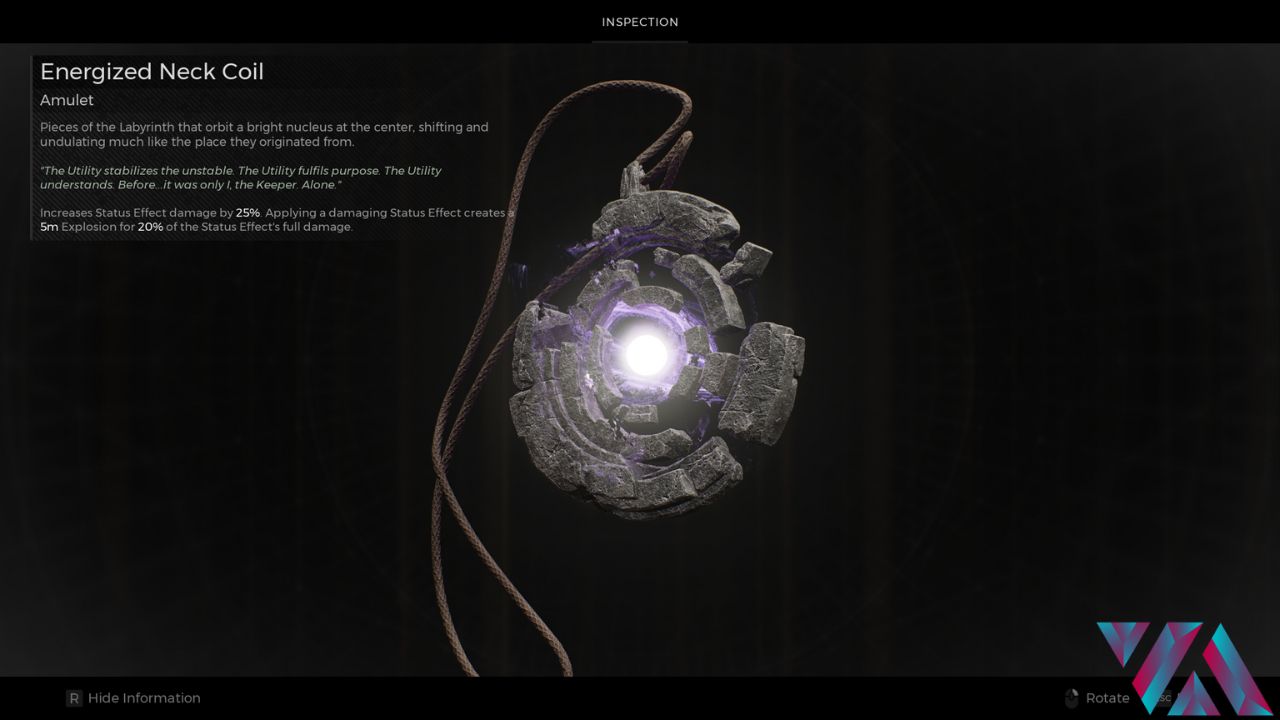
- You can find it in the Labyrinth World.
- The Neck Coil can generate a 25% increase in Status Effect damage.
- It is perfect for multiplayer modes.
- The Amulet also delivers a 5m explosion for 20% of the Status Effect’s total damage if you apply a damaging Status Effect.
Rings
Moving onto the next category, I have the Rings. Each player can have access to four Rings for their Build. They assist in Mod regeneration, stat boosts, damage reduction, movement speed, and other attributes.
Fire Stone
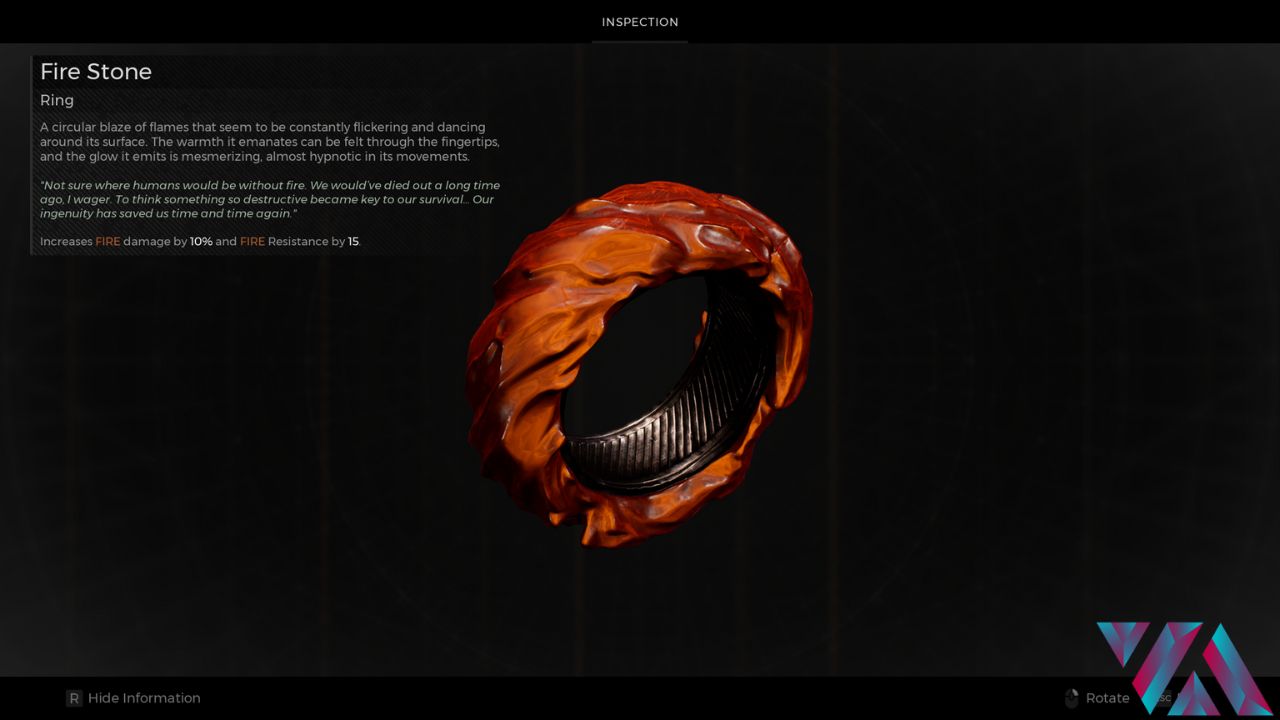
The Fire Stone pairs well with the Hot Shot modification on your weapon. Dealing 10% more Fire damage to the enemies. Any weapon with the Hot Shot Mod will do tremendous Damage Per Second and wipe out groups of enemies within one magazine.
The Fire Stone is seen to be useful against tough bosses in the Labyrinth, Yaesha, and Losomn World. My choice of weapon to use the Hot Shot on is the MP60-R SMG. It has insane DPS and does tremendous damage with the Fire attribute.
Stone of Balance
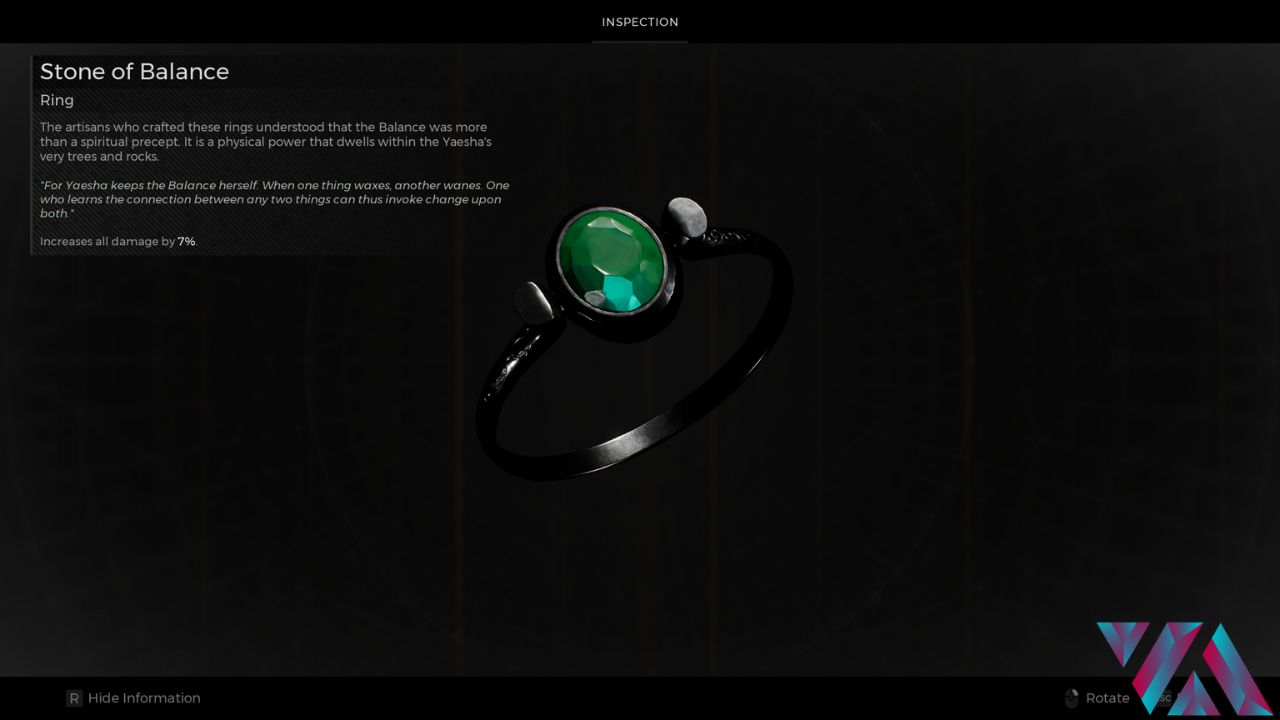
The description says it all. I’ve been using the Stone of Balance for quite some time now, and honestly, it is the best in terms of overall damage your character can dish out. The Ring increases your damage by 7%. Whether the damage comes from melee or ranged, any attack will have an increased 7% damage.
As a player in Remnant 2, I suggest you get the highest damage-dealing weapons to clear out dungeons and the mass of enemies efficiently and timely. Otherwise, you’ll succumb to your death rather quickly. In my time of playing, I’ve died multiple times due to my current character level, but that’s because I’m trying to save up points instead of using them on unnecessary upgrades.
Momentum Driver
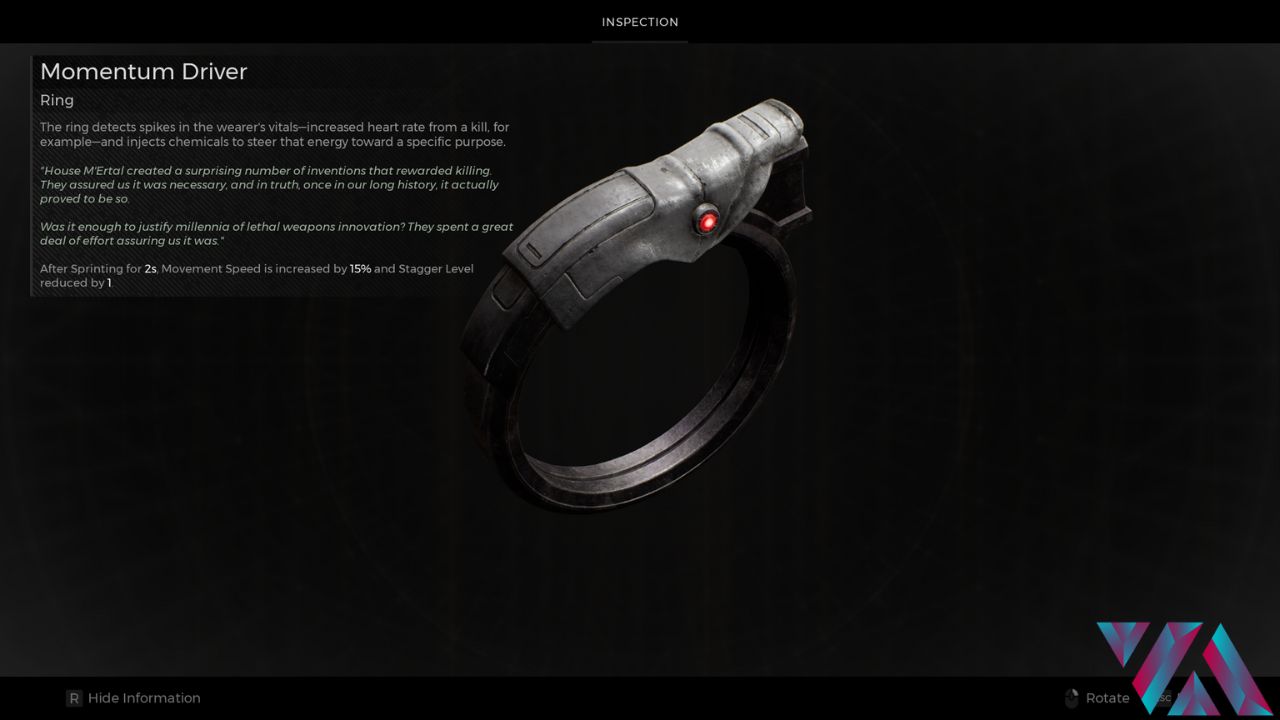
There are 130+ rings in Remnant 2, and you can always find a suitable Ring for your Build. If you feel like changing the Hengine, you are more than welcome to try your luck! However, Momentum Driver is a must-have on your Build. If you’re looking for extra ways to increase your Movement Speed, this is the Ring for you.
The Ring increases your Movement Speed and reduces your chances of getting Staggered by enemy attacks. It comes in handy when swarmed by a group of enemies and having to find a way out as soon as you can. With the heavy Armor I use on Hengine, this is a beneficial Ring to equip on the Build. You need all the speed you can get!
Meteorite Shard Ring
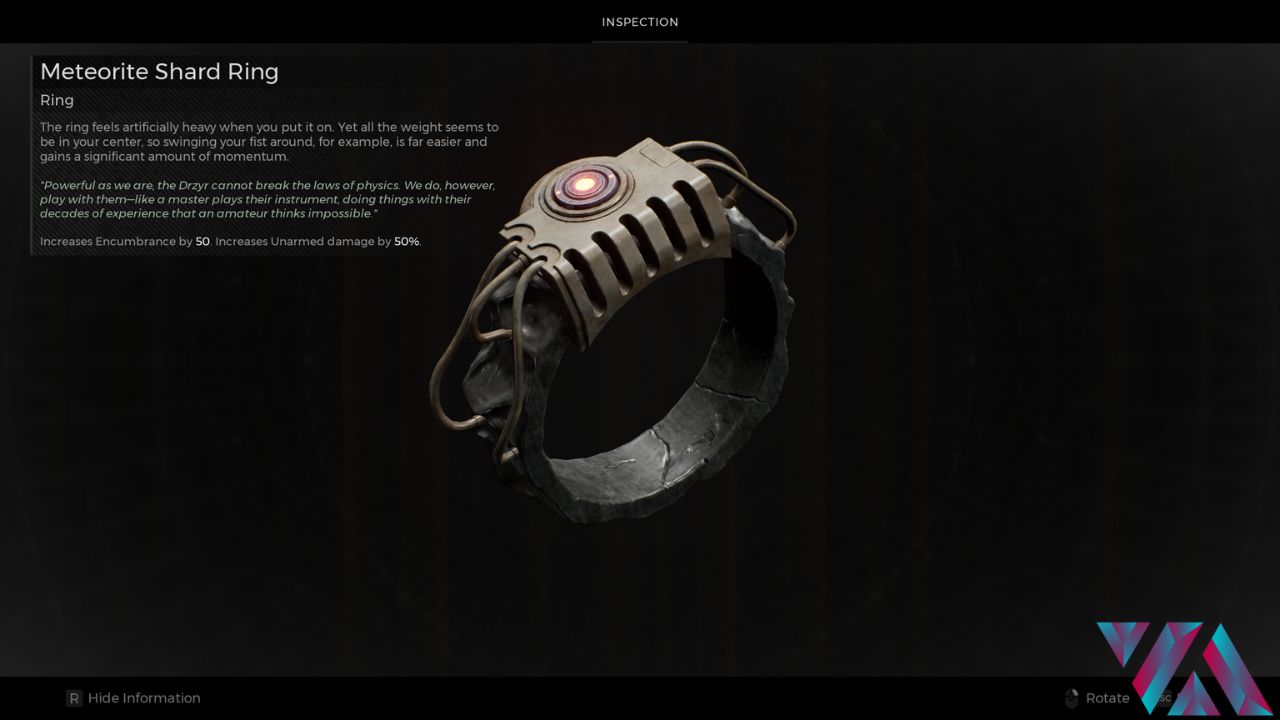
As a Handler/Engineer, you will run out of ammo soon. Hence, the best way is a Ring that increases your unarmed damage by 50%. It means if you have weapons such as the Knuckle Duster or other fist weapons.
Despite all that, the Ring also increases your ability to dodge and roll effectively without using large sums of Stamina. It increases your Encumbrance by 50%.
Dense Silicon Ring
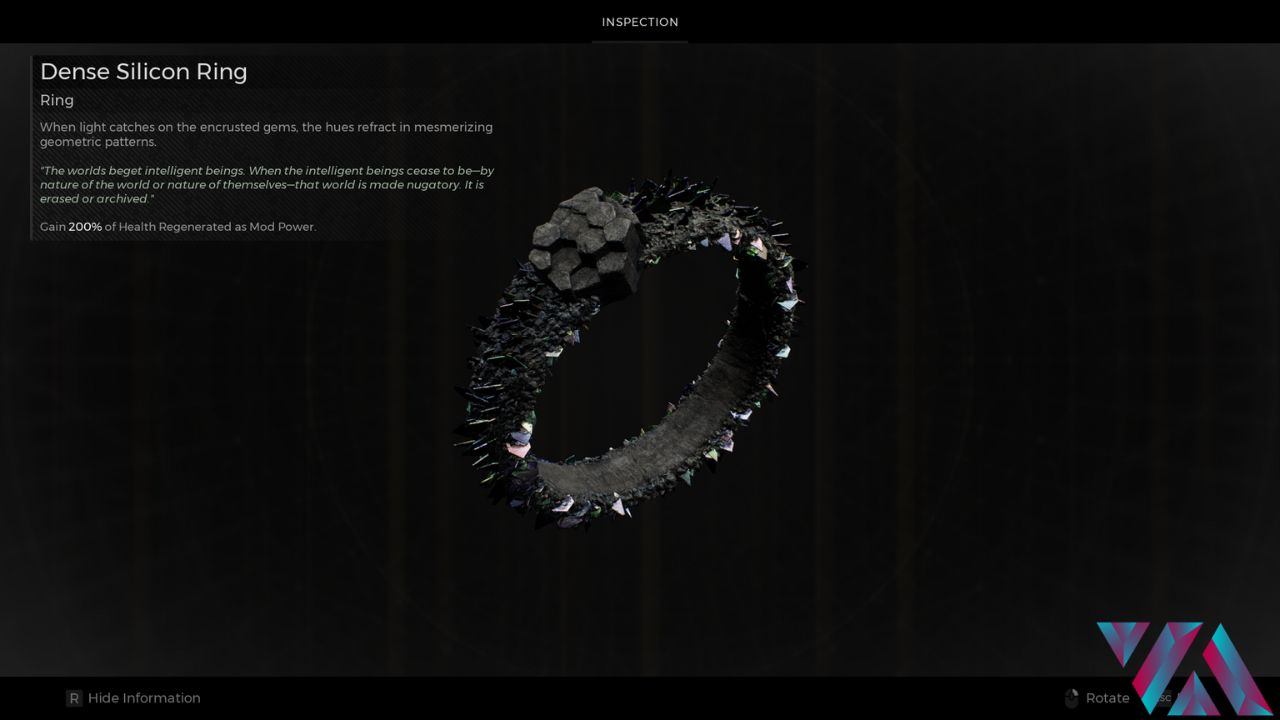
The Ring pairs well with the Encrypted Ring giving you a perfect Healing Build, but we’re not solely focusing on Healing. I also want my character to dish out the highest damage possible. The Dense Silicon Ring allows your character to regain 200% Health as Mod Power, which means any Health that you’ve regenerated, be it a relic or a mod, will generate 200% of that Health as Mod Power.
Primary Weapon
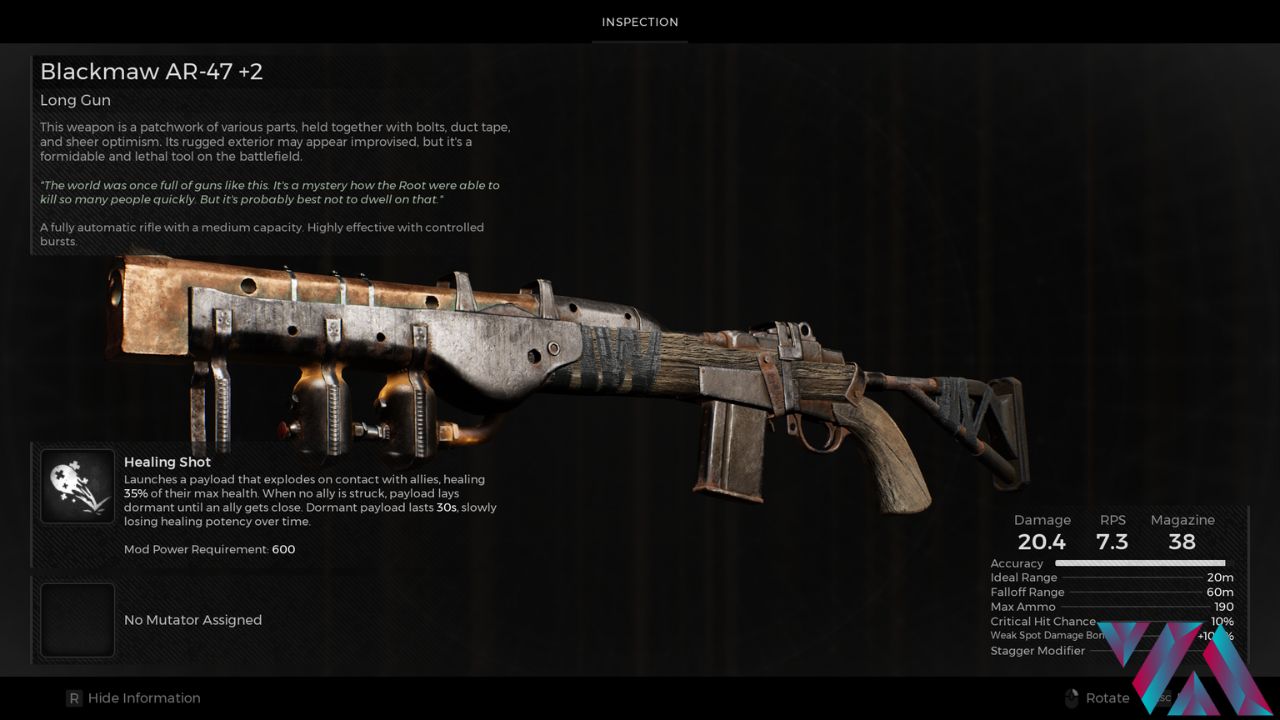
Here are the stats for the Blackmaw AR-47 Weapon:
| Stats | Value |
|---|---|
| Damage | 17 |
| RPS | 7.3 |
| Magazine | 38 |
| Ideal Range | 20m |
| Falloff Damage | 60m |
| Max Ammo | 190 |
| Critical Hit Chance | 10% |
| Weak Spot Damage Bonus | +100% |
| Stagger Modifier | 0% |
I’ve equipped Blackmaw with a Healing Shot mod, which helps me in challenging situations. When you’re in a tough spot and are swarmed by groups of enemies, you’ll find Healing Shot a vital asset for your Build. You get two shots for this mod, and once those are drained, you always have enough rounds to rejuvenate the slots. Furthermore, the Blackmaw has 38 rounds in the magazine and excellent accuracy, which I am very fond of.
Furthermore, you can also damage enemies at a distance, making the weapon work as a sniper in most cases. However, the farther you aim your target, the lesser the damage! This weapon’s damage at close range is surprisingly deadly, so if you’re ever caught in a close-range scuffle between groups of enemies or mini-bosses, this will be your go-to weapon, as it guarantees a swift kill! Not to mention the great opportunity to gain those critical hits.
Secondary Weapon
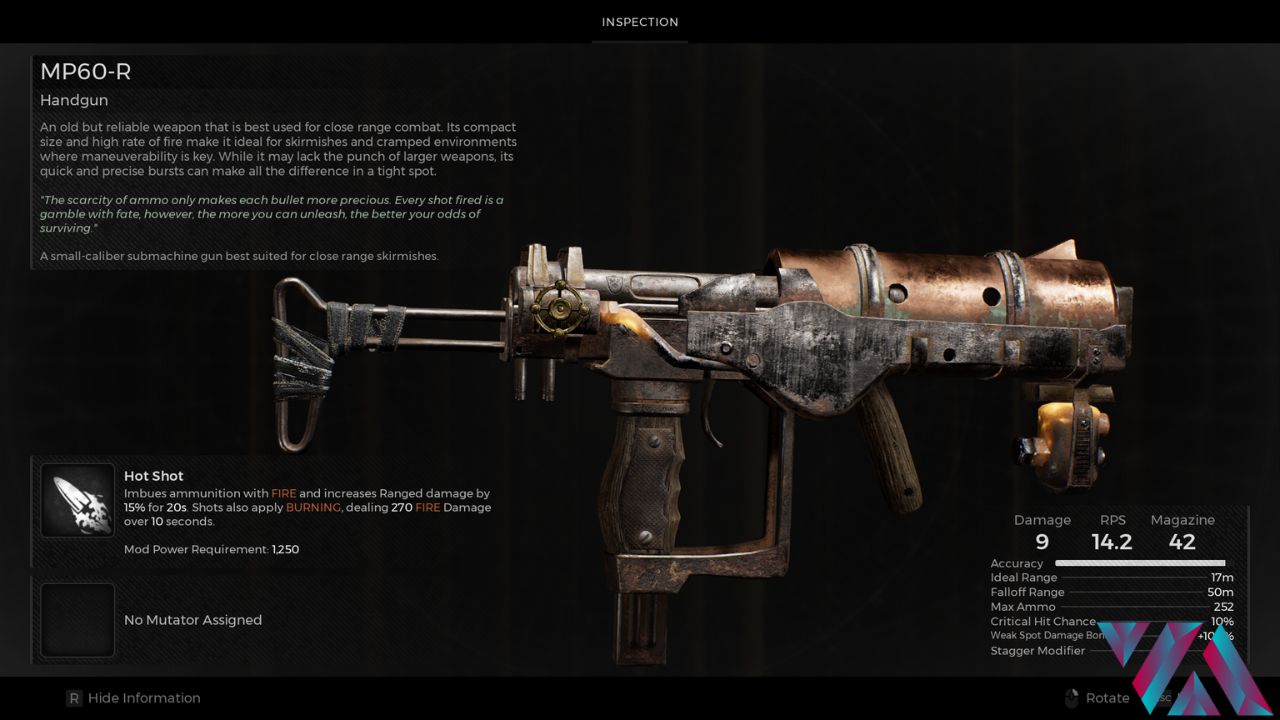
Here are the stats for MP60-R SMG:
| Stats | Value |
|---|---|
| Damage | 9 |
| RPS | 14.2 |
| Magazine | 42 |
| Ideal Range | 17m |
| Falloff Damage | 50m |
| Max Ammo | 252 |
| Critical Hit Chance | 10% |
| Weak Spot Damage Bonus | +100% |
| Stagger Modifier | 0% |
You should equip the MP60-R SMG with the Hot Shot mod, which ignites your bullets with fire and deals enhanced damage per second. The mod allows you to fire bullets for 2os and recover the bar afterward. Moreover, the SMG is a monster in close-range fights. It dishes out insane Damage Per Second and obliterates any target in its radar. Combine that with the Hot Shot mod, and you get a killing machine!
I’ve been using this combo for a while now, and it has saved me countless times against groups of enemies. You’ll be able to relate to the feeling of fighting against endless spawned enemies, especially in the Yaesha world!
Melee Weapon
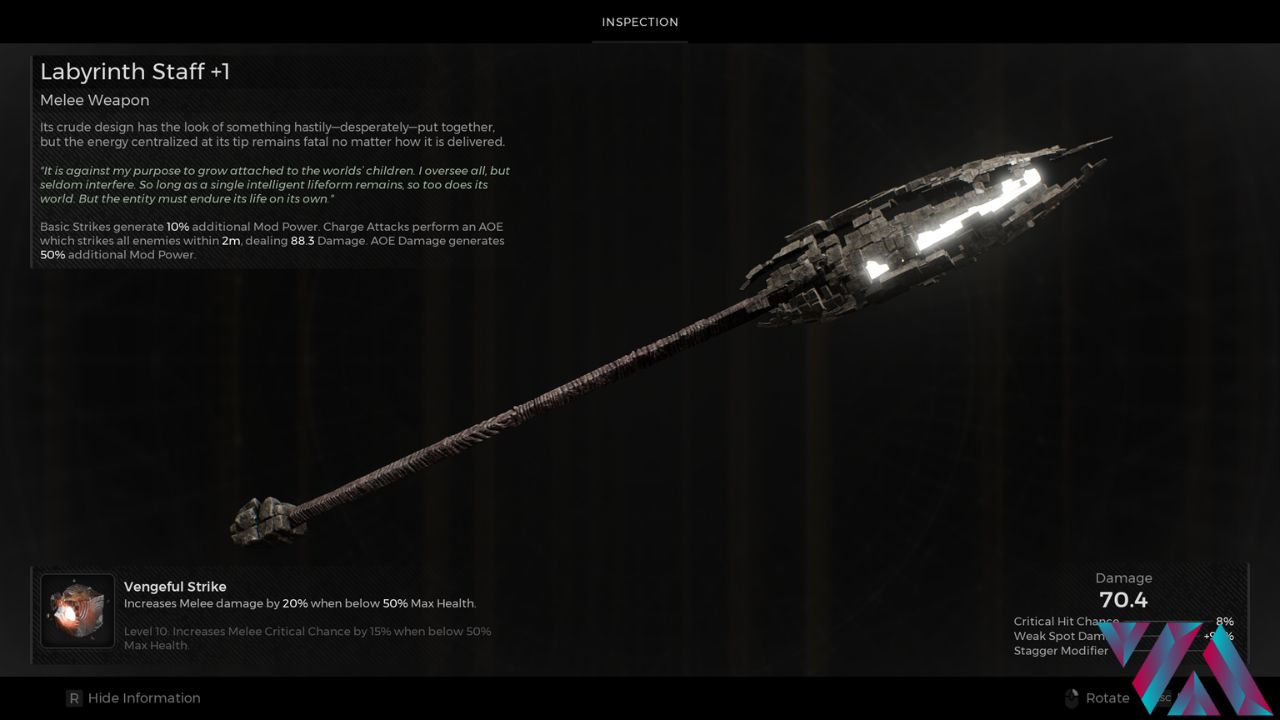
Here are the stats for the Labyrinth Staff:
| Stats | Value |
|---|---|
| Damage | 64 |
| Critical Hit Chance | 8% |
| Weak Spot Damage | +95% |
| Stagger Modifier | 5% |
When I’m out of ammo, which rarely happens, the Labyrinth Staff saves my skin! It has 70.4 damage at level 2 and has a Critical Hit Chance of 8%. When you’re in Losomn, Yaesha, N’erud, or any other world, this melee weapon will help you even if you have enough ammo to save yourself!
When holding the Attack button, your character will slam the Staff on the ground, creating AOE damage that knocks enemies back. It is a helpful trick to swat enemies away from you! Moreover, Vengeful Strike makes things even more interesting; it increases Melee Damage by 20% when you’re below 50% of your Max Health. Turns out you’ll be able to deal more damage when you’re low on Health!
Armor
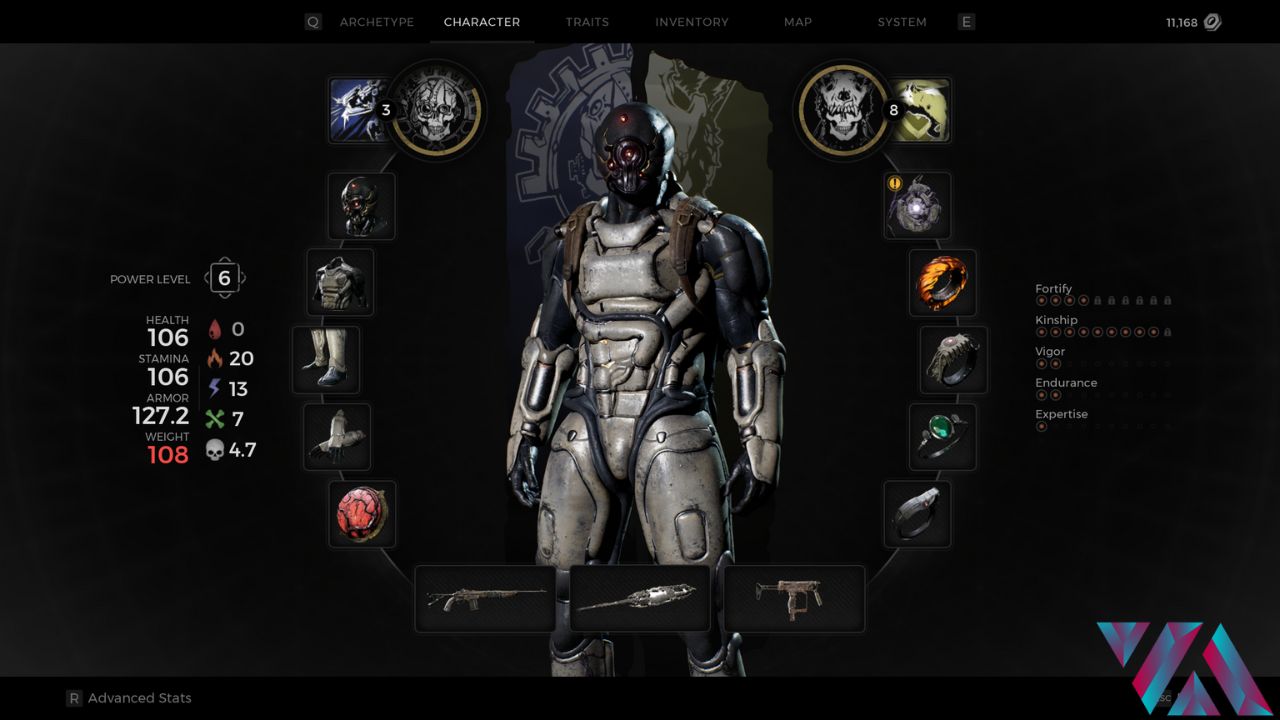
Here are the stats for the Technician Set:
| Armor Set | Armor | Weight | Bleed Res. | Fire Res. | Shock Res. | Blight Res. | Corrosive Res. |
|---|---|---|---|---|---|---|---|
| Technician Helmet | 14 | 8 | 0 | 1 | 2 | 0 | 2 |
| Technician Gloves | 10 | 6 | 0 | 1 | 2 | 0 | 1 |
| Technician Bodyplate | 56 | 30 | 0 | 2 | 6 | 0 | 2 |
| Technician Greaves | 26 | 14 | 0 | 1 | 3 | 0 | 7 |
The Armor I’m comfortable with is the Technician Set. You can get it when you look for the Engineer Archetype in N’erud. Although the Armor set weighs over 108 for this Build, it provides excellent protection against all attacks.
You’ll find it troublesome against bosses that deal projectiles that you can’t dodge due to the Stamina Penalty. However, you can use other evasive maneuvers! On the bright side, the armour set looks absolutely shredded. AND offers high resistance to Electricity.
- A Companion to help in battles.
- Numerous Healing & Damage Buff Abilities.
- High Survivability.
- Support Player.
- Can revive allies & player himself.
- Slow Movement Speed.
- Difficult to dodge attacks.
- Hard to survive on Solo without help from the team or getting a second Archetype.
My Thoughts On The Handler Build
The Handler Build looks out of shape, but it gets the job done! I’ve been using the items mentioned above, and they have proved to be worthy and are more than enough to consider it the Best Build in Remnant 2. In my experience, you might initially face difficulties getting used to its passive playstyle, but once you complete the build, it will be a beast in any situation.
Once you’ve unlocked better alternatives while progressing through the game, you can opt for those Rings, Amulets, and even better weapons for Handler. Maybe you’ll grow fond of it even more than I am!
For more guides related to Remnant 2, you can check out the following;
Good job! Please give your positive feedback 😏
How could we improve this post? Please Help us. 💡
23-year old seasoned content writer with 5 years of expertise in gaming, tourism, and tech. Committed to VA since 2021, with prior internship experience at AK Broadcasts. Distinguished in English and highly skilled in writing. Enthusiastic gamer favoring Tekken, Apex Legends, and COD. Currently in the final year of BBA, with exceptional HR skills. Check out Reeshail’s Steam and learn more about his gaming expertise.


