

In Star Wars Jedi: Survivor, all seven Jedi Temples are fun to explore and hide some items that can be useful in your gameplay. One of them is the Chamber of Detachment. It might look easier to get through this one, but it has a trick.
This guide will discuss the Chamber of Detachment, starting from its location and extending to the collectible items. Let’s dive right into it!
Key Takeaways:
- The Chamber of Detachment is located on the Mountain Ascent close to the Meditation point.
- Players will need Cal’s Dash ability to pass through the green barriers.
- After going through two green barriers, make a left to observe a waterfall.
- Jump on the lower land area and go behind the waterfall to look for an elevator.
- The elevator will take you to the entrance of the Chamber of Detachment.
- You will find three Force Echoes inside the large room on the ground level.
- A Datadisc can be found stuck inside the black blockage on the left wall.
- The chest, stuck behind a cube, contains a cosmetic item called Jedi Paint.
- Lastly, players will find Patience Park at a high point inside a room. Using the cubes and lifted panels can get you to the perk.
Prerequisites To Exploring
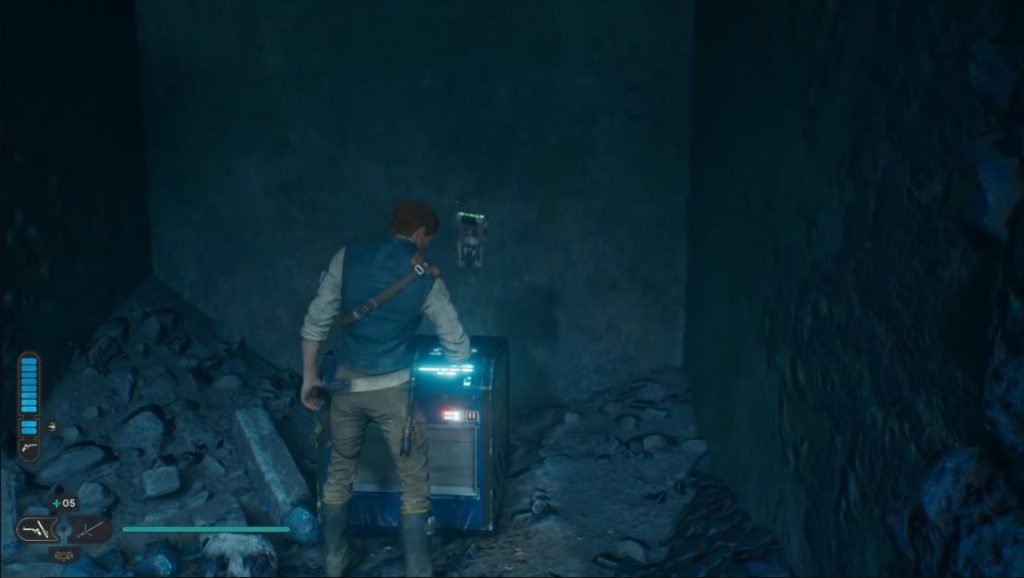
Some abilities must be explored before players plan on exploring the desired location. The droid, BD-1, will be helpful inside the Chamber of Detachment as its Koboh Grinder ability will be frequently used.
The Koboh Grinder can be unlocked on planet Koboh while playing the Research Tanalorr on Koboh mission. A cut scene will play when Cal interacts with a white container covered in Koboh Matter. During the scene, the Koboh Grinder ability is installed inside BD-1.
Cal’s Dash should also be kept as it will be used to push through the green barriers that look like a laser field. Using the Dash ability through them will let you reach the other side, as normal walking is useless in this scenario. Furthermore, you can unlock the Dash when visiting Jedha.
Players can also use the Dash to reach the unreachable high-altitude areas with the double jump. Moreover, it must be used precisely after the double jump. However, players must time their jump if they want a perfect landing.
Chamber Of Detachment Location
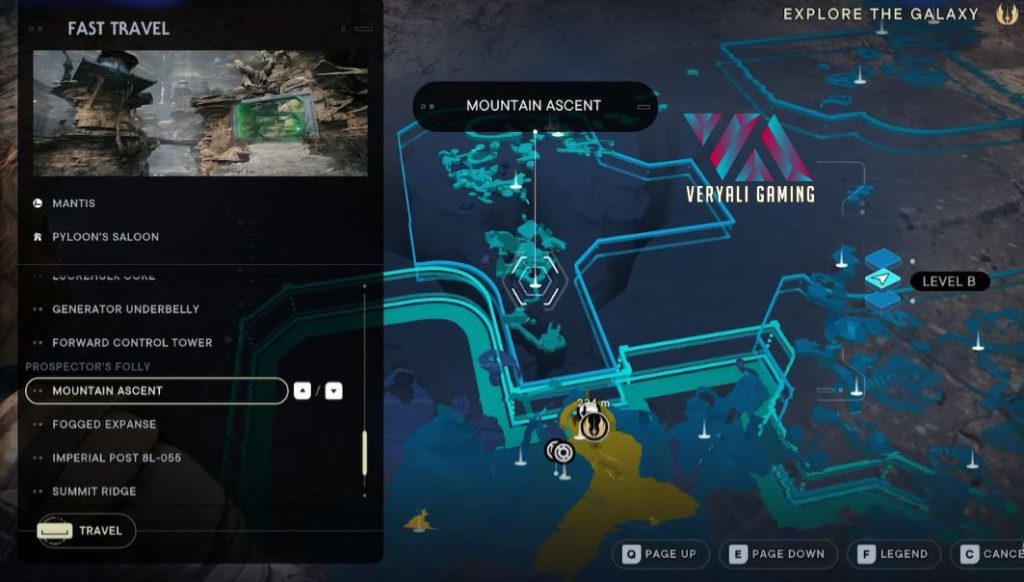
The Chamber of Detachment will be accessible when you make your way to Koboh for the third time. Moreover, this is also a potential Rumor location called “Explore the High Republic Chamber on the Mountain.” The side quest hints at exploring the Chamber of Detachment.
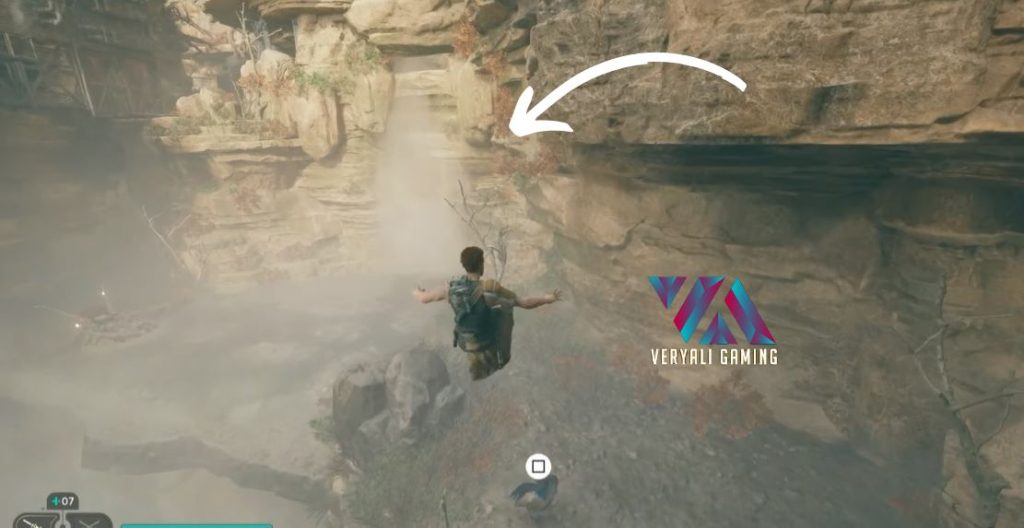
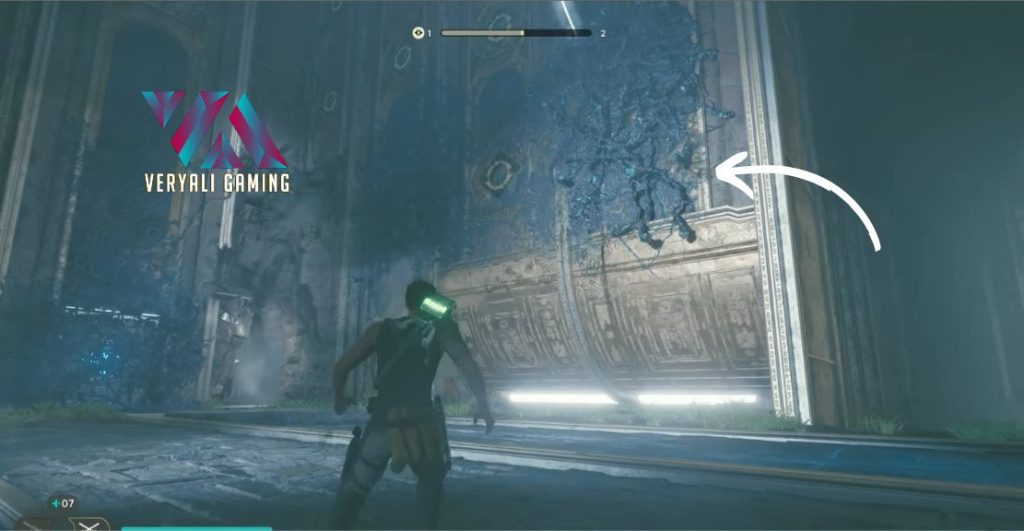
The referred mountain is known as the Mountain Ascent. After you reach the marked map location of the meditation point, a green barrier will be on your face. Use the Dash to get through it quickly. Furthermore, try jumping before the dash to make the action smoother.

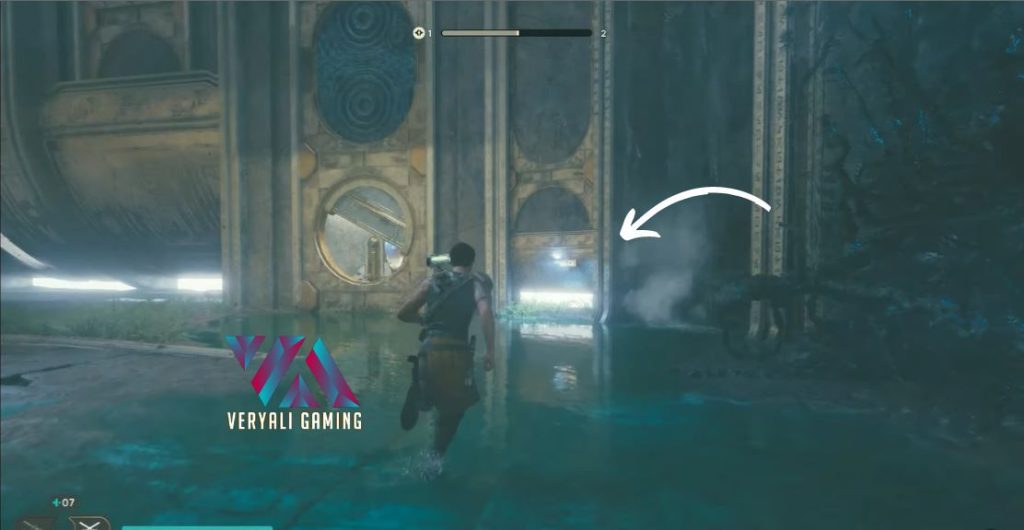
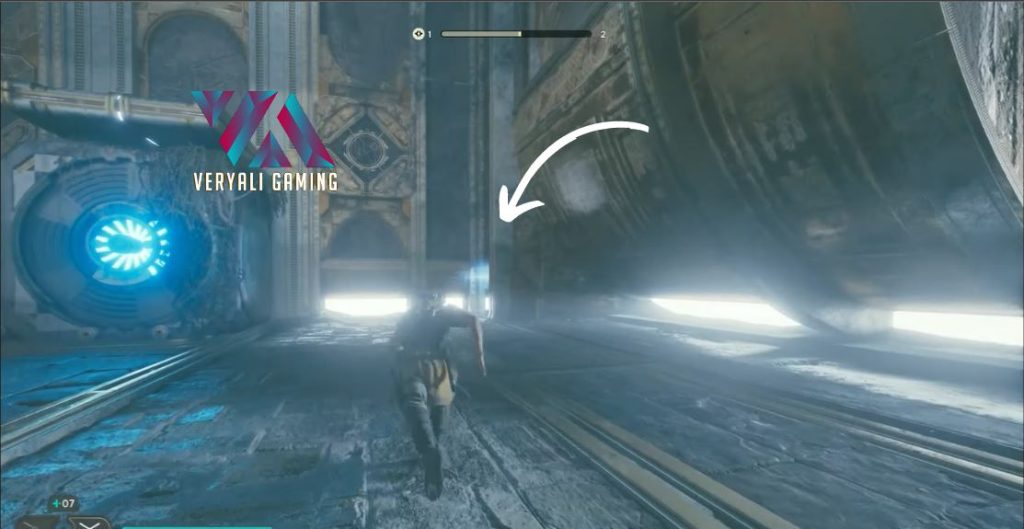
Take a left from there and stand on the Cliff edge. You will observe a waterfall and a land area in front. The Chamber of Detachment will be behind the waterfall. Furthermore, it would be best to take the elevator, as it will take you to the chamber entrance.
Exploring The Jedi Chamber
Force Echoes
As you exit the lift, you will notice a symbol on the wall in front. These symbols indicate the location of Force Echoes. Approach it to sense the Echo, A Rare Find, and add it to your collection.

Proceed further to find yourself in a large room. Take a quick right towards the wall. A Missing in Action Force Echo will be available over there. Sense it to move forward.
Follow the same wall to its far end to the top right corner of the room. The third and final Force Echo, Worlds Away, will be there. You must collect it to proceed toward the puzzle.
Datadisc
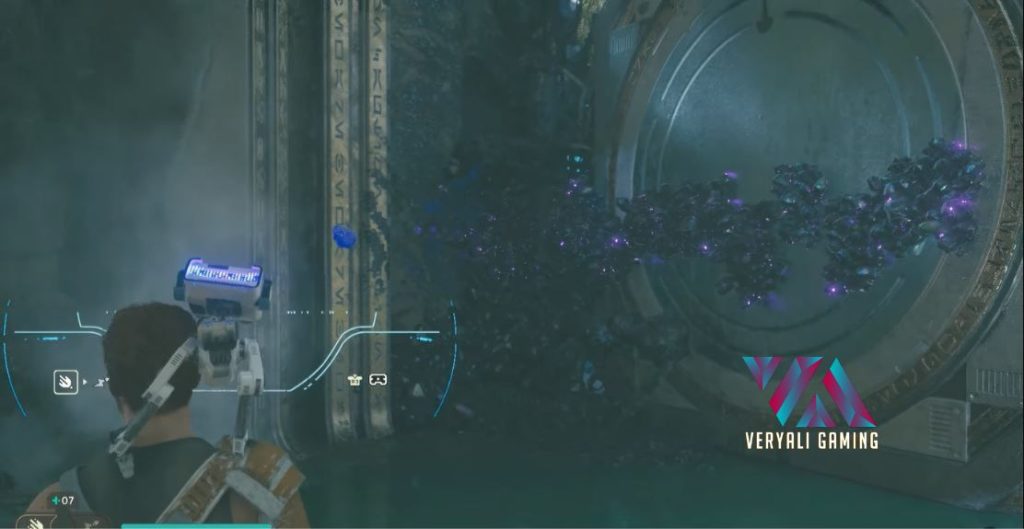
Looking to your left from the third Force Echo location, you will notice a large cube joined with the wall. Use your Force Pull ability to pull the block away from the wall to access the laser-initiating wall.
Grab the wall and put it inside the holder to the cube’s left. The circular section inside the wall, where the ball holder is, will have a rotating semi-circle piece of metal. This indicates that the laser will cut when the metal piece faces the ball for some time.
Using BD-1’s Koboh Grinder ability, facing the left wall, take it to the black blockage on the same division. Connecting the Koboh matter trail and the black mass will burn it and drop a Datadisc stuck inside the black mass.
Cosmetic Item Chest
Moving toward the 5th collectible, we need access to the chest hidden behind the two cubes on the left. One of the blocks is exposed, but the other is stuck behind the jam. To get it out, spray some Koboh Matter on the wall and the cube’s left side and then pull it back.
The Koboh Matter will catch fire when it comes in contact with the laser. Take the cube back to its original position so the trail on the wall also burns so you can take out the second block.
Use the Force Pull ability to take both blocks to the other side. Open the chest, providing you with the Jedi Paint cosmetic item for BD-1.
Moving further, a large tile in the center of the room pulls down a panel when pressure is applied.
Patience Perk
Use Cal’s Force Pull ability mechanics to place one cube on the tile in the center and the other on the panel at the far end. When the cube is placed on it, move the other one off the plate so it lifts.
Get on the moving cube and jump to the lifted cube to reach the final collectible item inside the Chamber of Detachment. It will be a Patience Perk; it will take up to three slots in your inventory.

When equipped, it will restore health when the Slow Time ability is used. This is a beneficial perk during intense combat situations.
Collectible Items With Their Locations
Here is a summary of all the collectibles we found in the Chamber of Detachment.
| Collectible Item | Location |
| A Rare Find | On the wall immediately after entering the Chamber of Detachment. |
| Missing in Action | At the bottom right corner of the large room |
| Worlds Away | At the top right corner of same large room |
| Datadisc | Stuck in the blockage on the left wall. Use Koboh Grinder to burn it. |
| Jedi Paint | Inside the chest hidden behind the second cube. |
| Patience Perk | Found on the elevated area. Use the lifted panel and the two cubes to get there. |
Final Remarks
That is about exploring the Chamber of Detachment in Star Wars Jedi: Survivor. The tricky part involves arranging the two cubes to reach the Patience Perk. Players can always keep track of their exploration percentage by opening the map so they know how many collectibles are left.
Check out:
- Star Wars Jedi: Survivor Chamber of Connection
- Star Wars Jedi: Survivor All Outfit Locations
- Star Wars Jedi: Survivor Find the Gorge’s Secret
Good job! Please give your positive feedback 😏
How could we improve this post? Please Help us. 💡
Ehtishaam is an enthusiastic gamer who is never tired of playing games and writing about them. He is pursuing his career in Electrical Engineering while keeping an active interest in CS. I keep myself busy playing football when I am not focused on content writing. My dedication towards gaming knew no bounds, as I started spending hours on my Pentium 4 PC, playing GTA. If you don’t see me posting content, I’ll probably be pushing rank in Valorant or Counter Strike. Connect with me on Steam if you plan on playing some competitive.
